Data Model Setup
Configure your object classes to your app's unique needs
Introduction
Medable provides a number of standard objects, such as the Account object which is critical to user management. When you sign up and your orgs are provisioned, an instance of the Account object is created for your initial admin user which is what allows you to log into your org(s).
Medable is designed to be extensible and customizable as well, though, so extending the standard objects and creating your own objects to suit your needs is quick and easy.
When extending a standard object or creating your own objects and properties, these are considered "custom" objects and properties. To avoid any naming collisions between standard and custom objects and properties, anything that you create is prefixed with a c_.
So, for example, if you were to add a custom "address" document property to the account object, the property would appear in the api as "caddress". The same holds true for object names. If you were to create a custom "Prescription" object, the api name for the object would be "c_prescription". This only impacts code and does not the UI for your applications. Although an object or property may have a `c` prefix, it can still have a human-readable label.
Creating Your First Custom Object
To create your own custom Medable object, login to your admin portal and access the objects menu under Settings > Objects
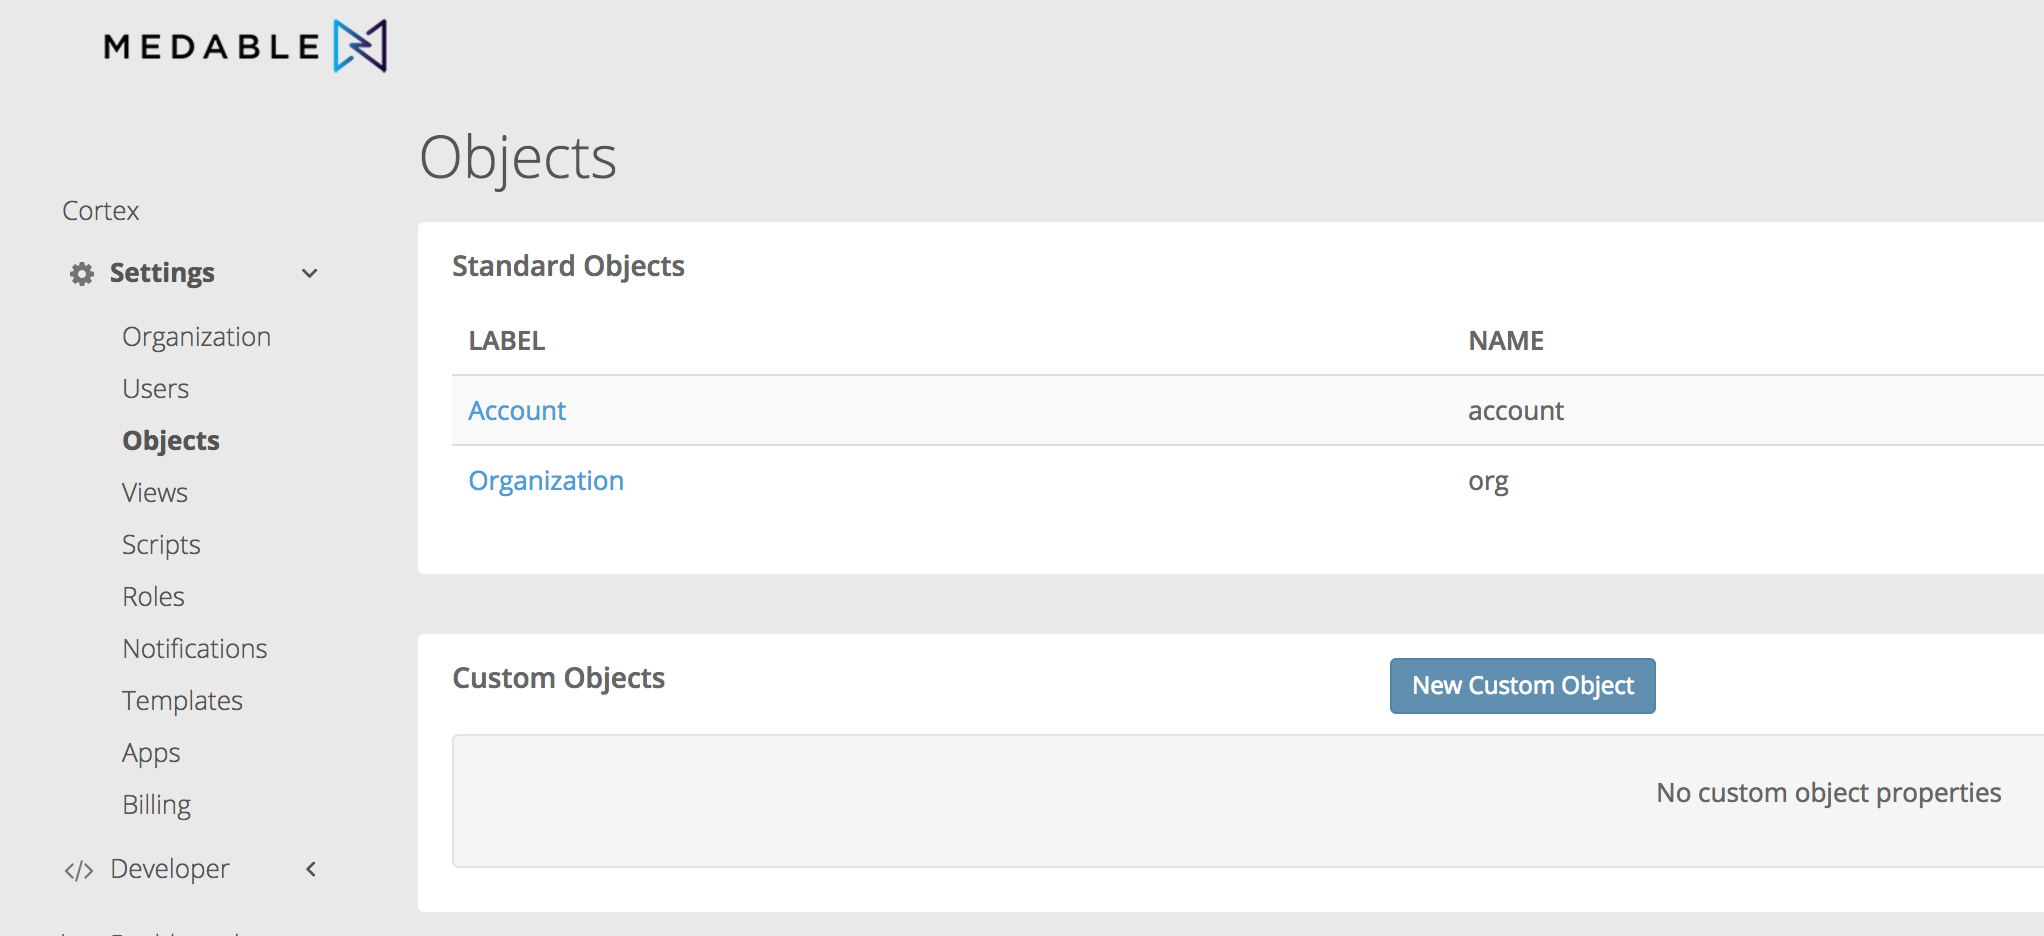
Click New Custom Object to create your first object.
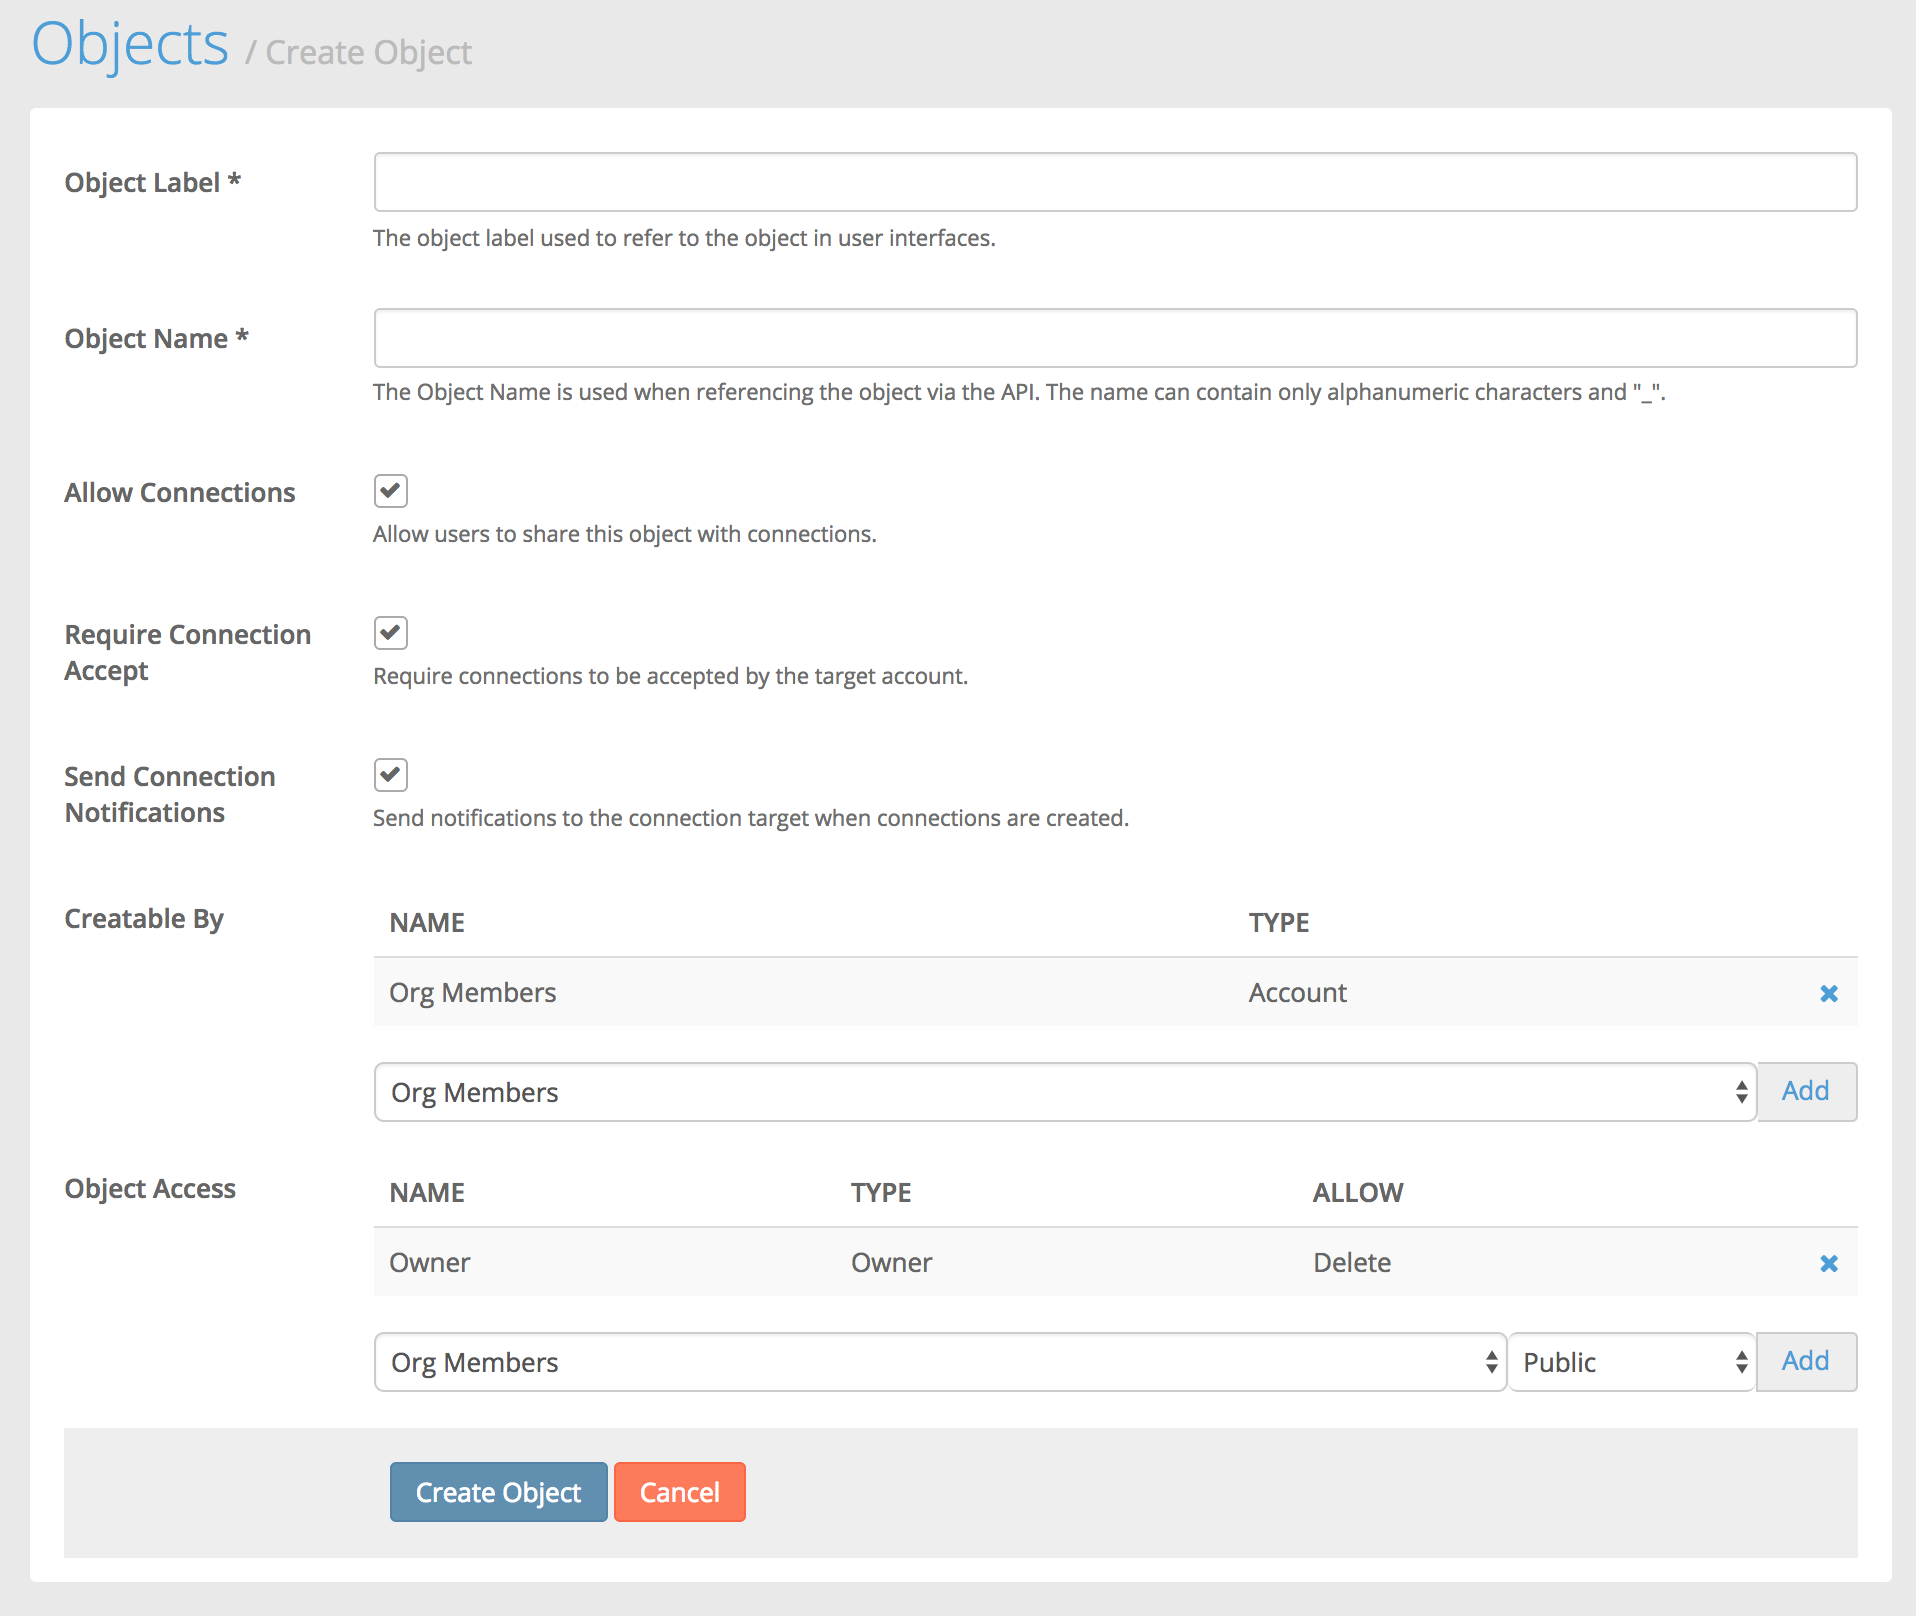
Here you can fill out:
- Object Label: The label of your object that can be used in UI
- Object Name: The api name of your object
- Connection Settings: See Working with Connections for more details.
- Allow Connections: Specify whether connections can be created for this object.
- Require Connection Accept: Specify whether connections to this object require acceptance
- Send Connection Notifications: Turn on or off notifications to targets when connections to this object are created.
- Access Control Settings: See Access Controls in the API documentation for more details.
- Creatable By: Specify users or roles that can create instances of this object
- Object Access: Specify the access levels that users and user roles have to instances of this object
Here we'll create a "Prescription" Object. Well set the label to "Prescription" and then the name to prescription. Note that all custom objects and property names are automatically prefixed with "c_" to help prevent collisions with standard objects and properties. So although we provide the name "prescription" it will become "c_prescription" after saving.
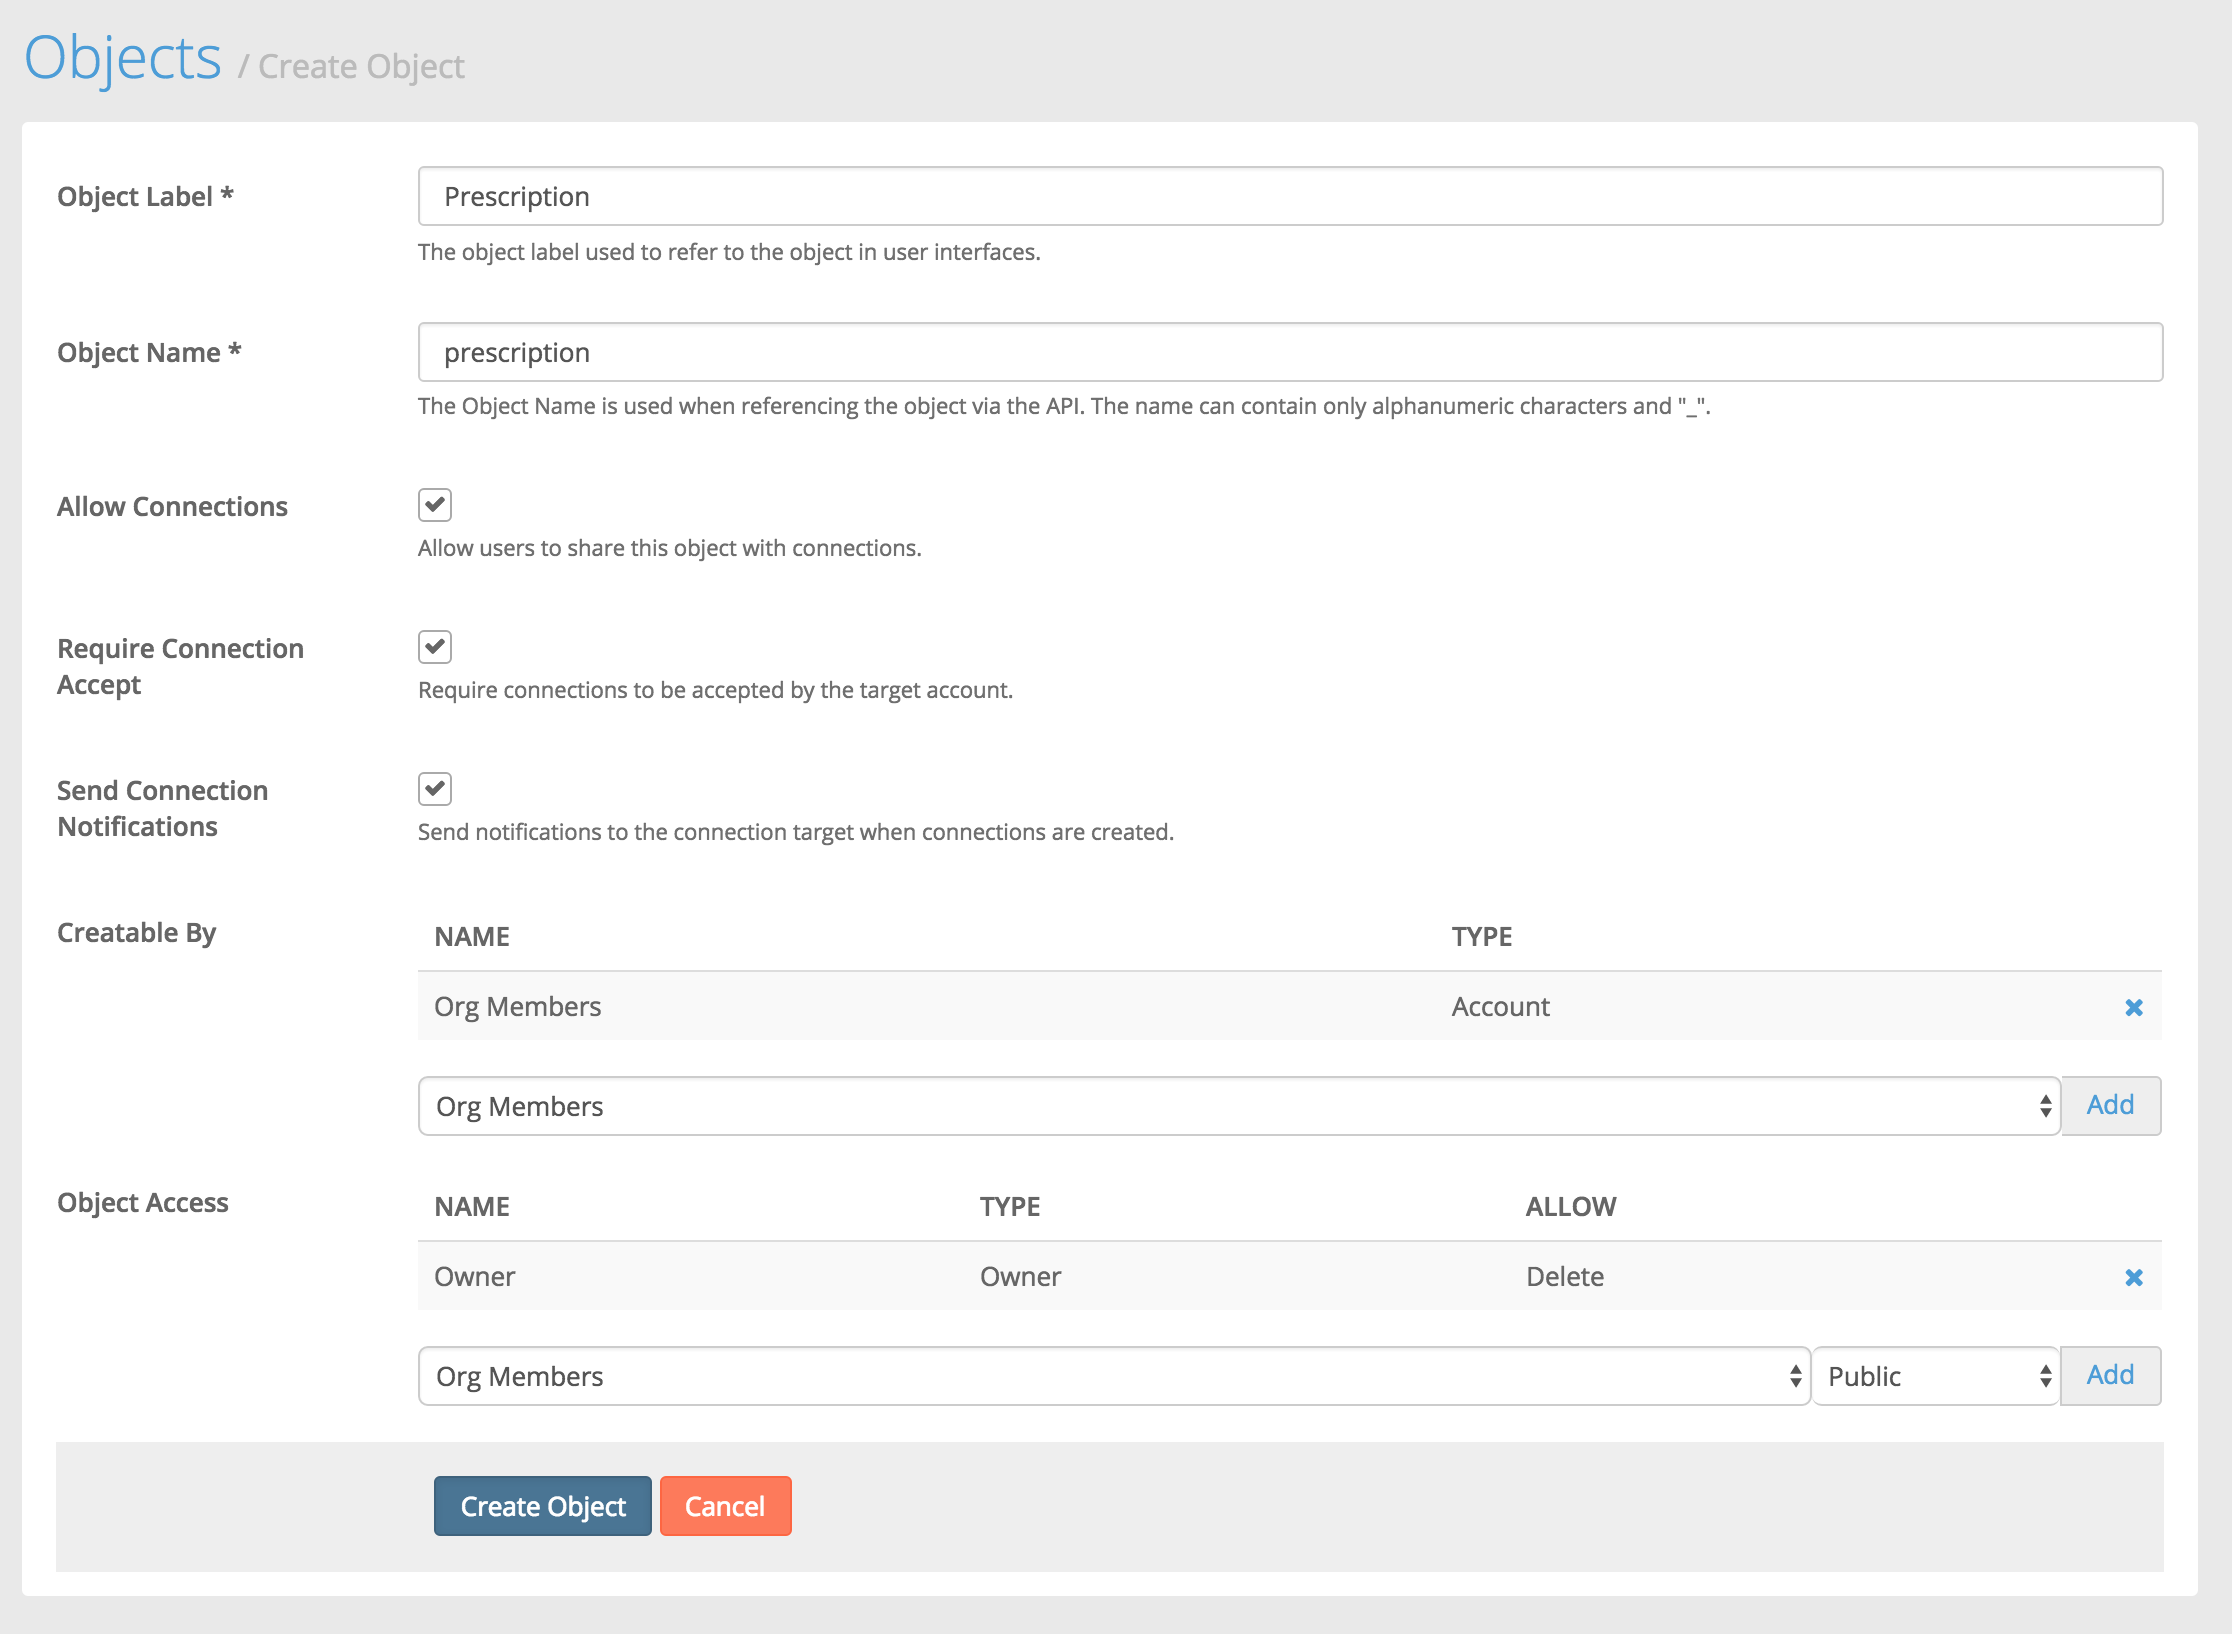
Click Create Object and your object will be created and you'll be taken to the object detail view.
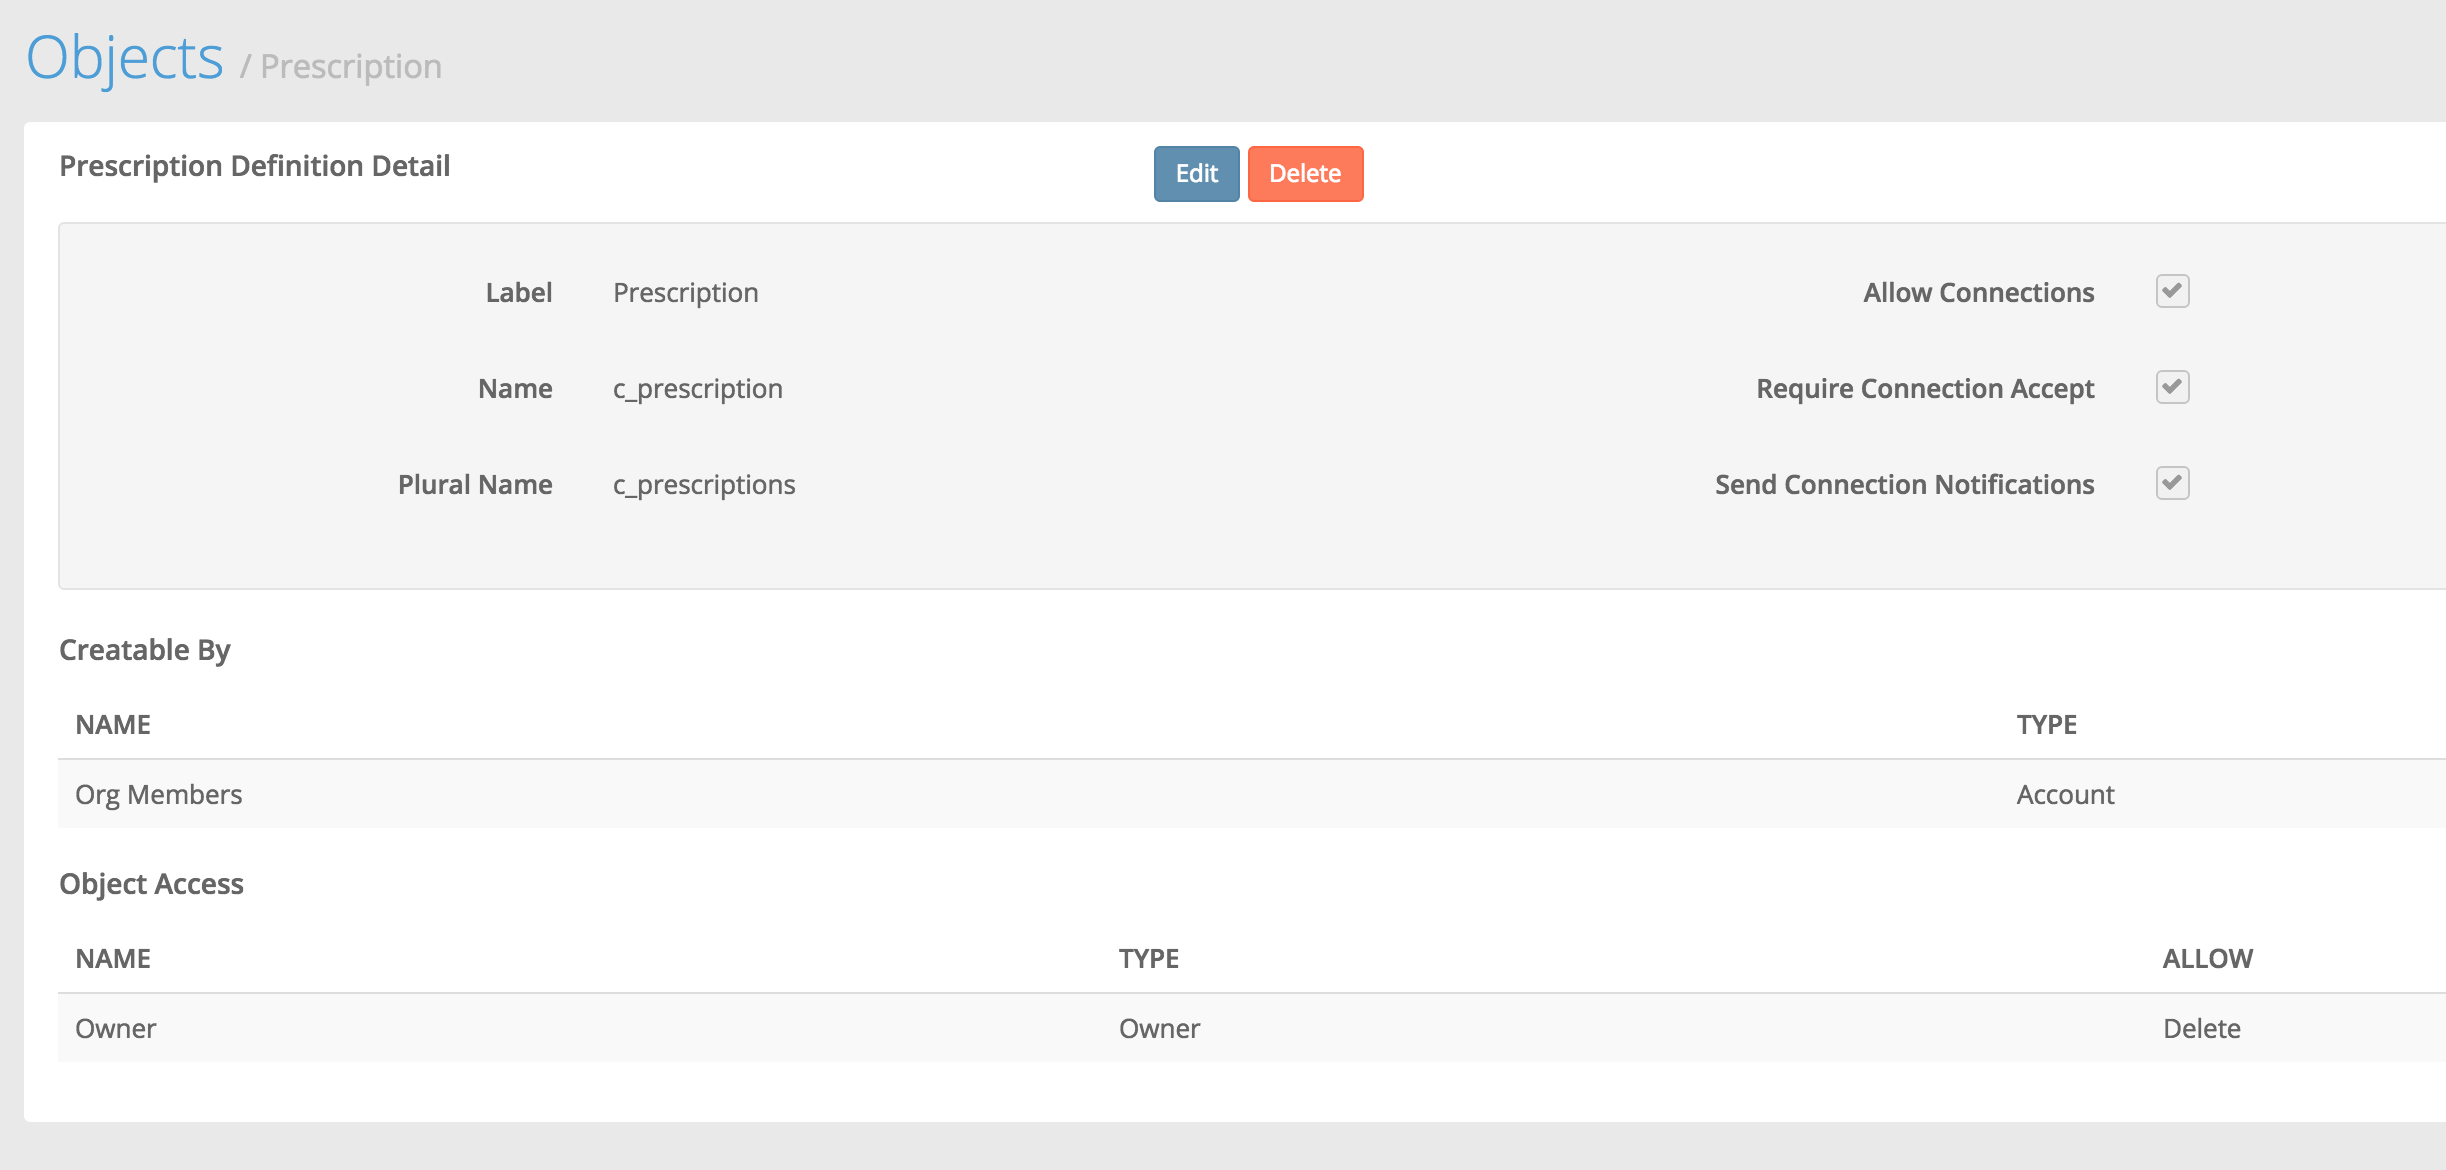
Now your object has been created. You'll notice all of the details you provided while creating the object except for one new property, Plural Name. The plural name is generated automatically. When referencing your object via the api, you use the plural name, e.g.:
GET /c_prescriptionsNow you're ready to add properties to your object.
Creating Your First Custom Property
Custom properties can be added to standard objects (e.g. Account) and to custom objects like the one you just created (c_prescription).
From an object's detail view, which can be accessed from Settings > Objects and then by clicking on the name of the object you'd like to view, you can add your own custom properties.
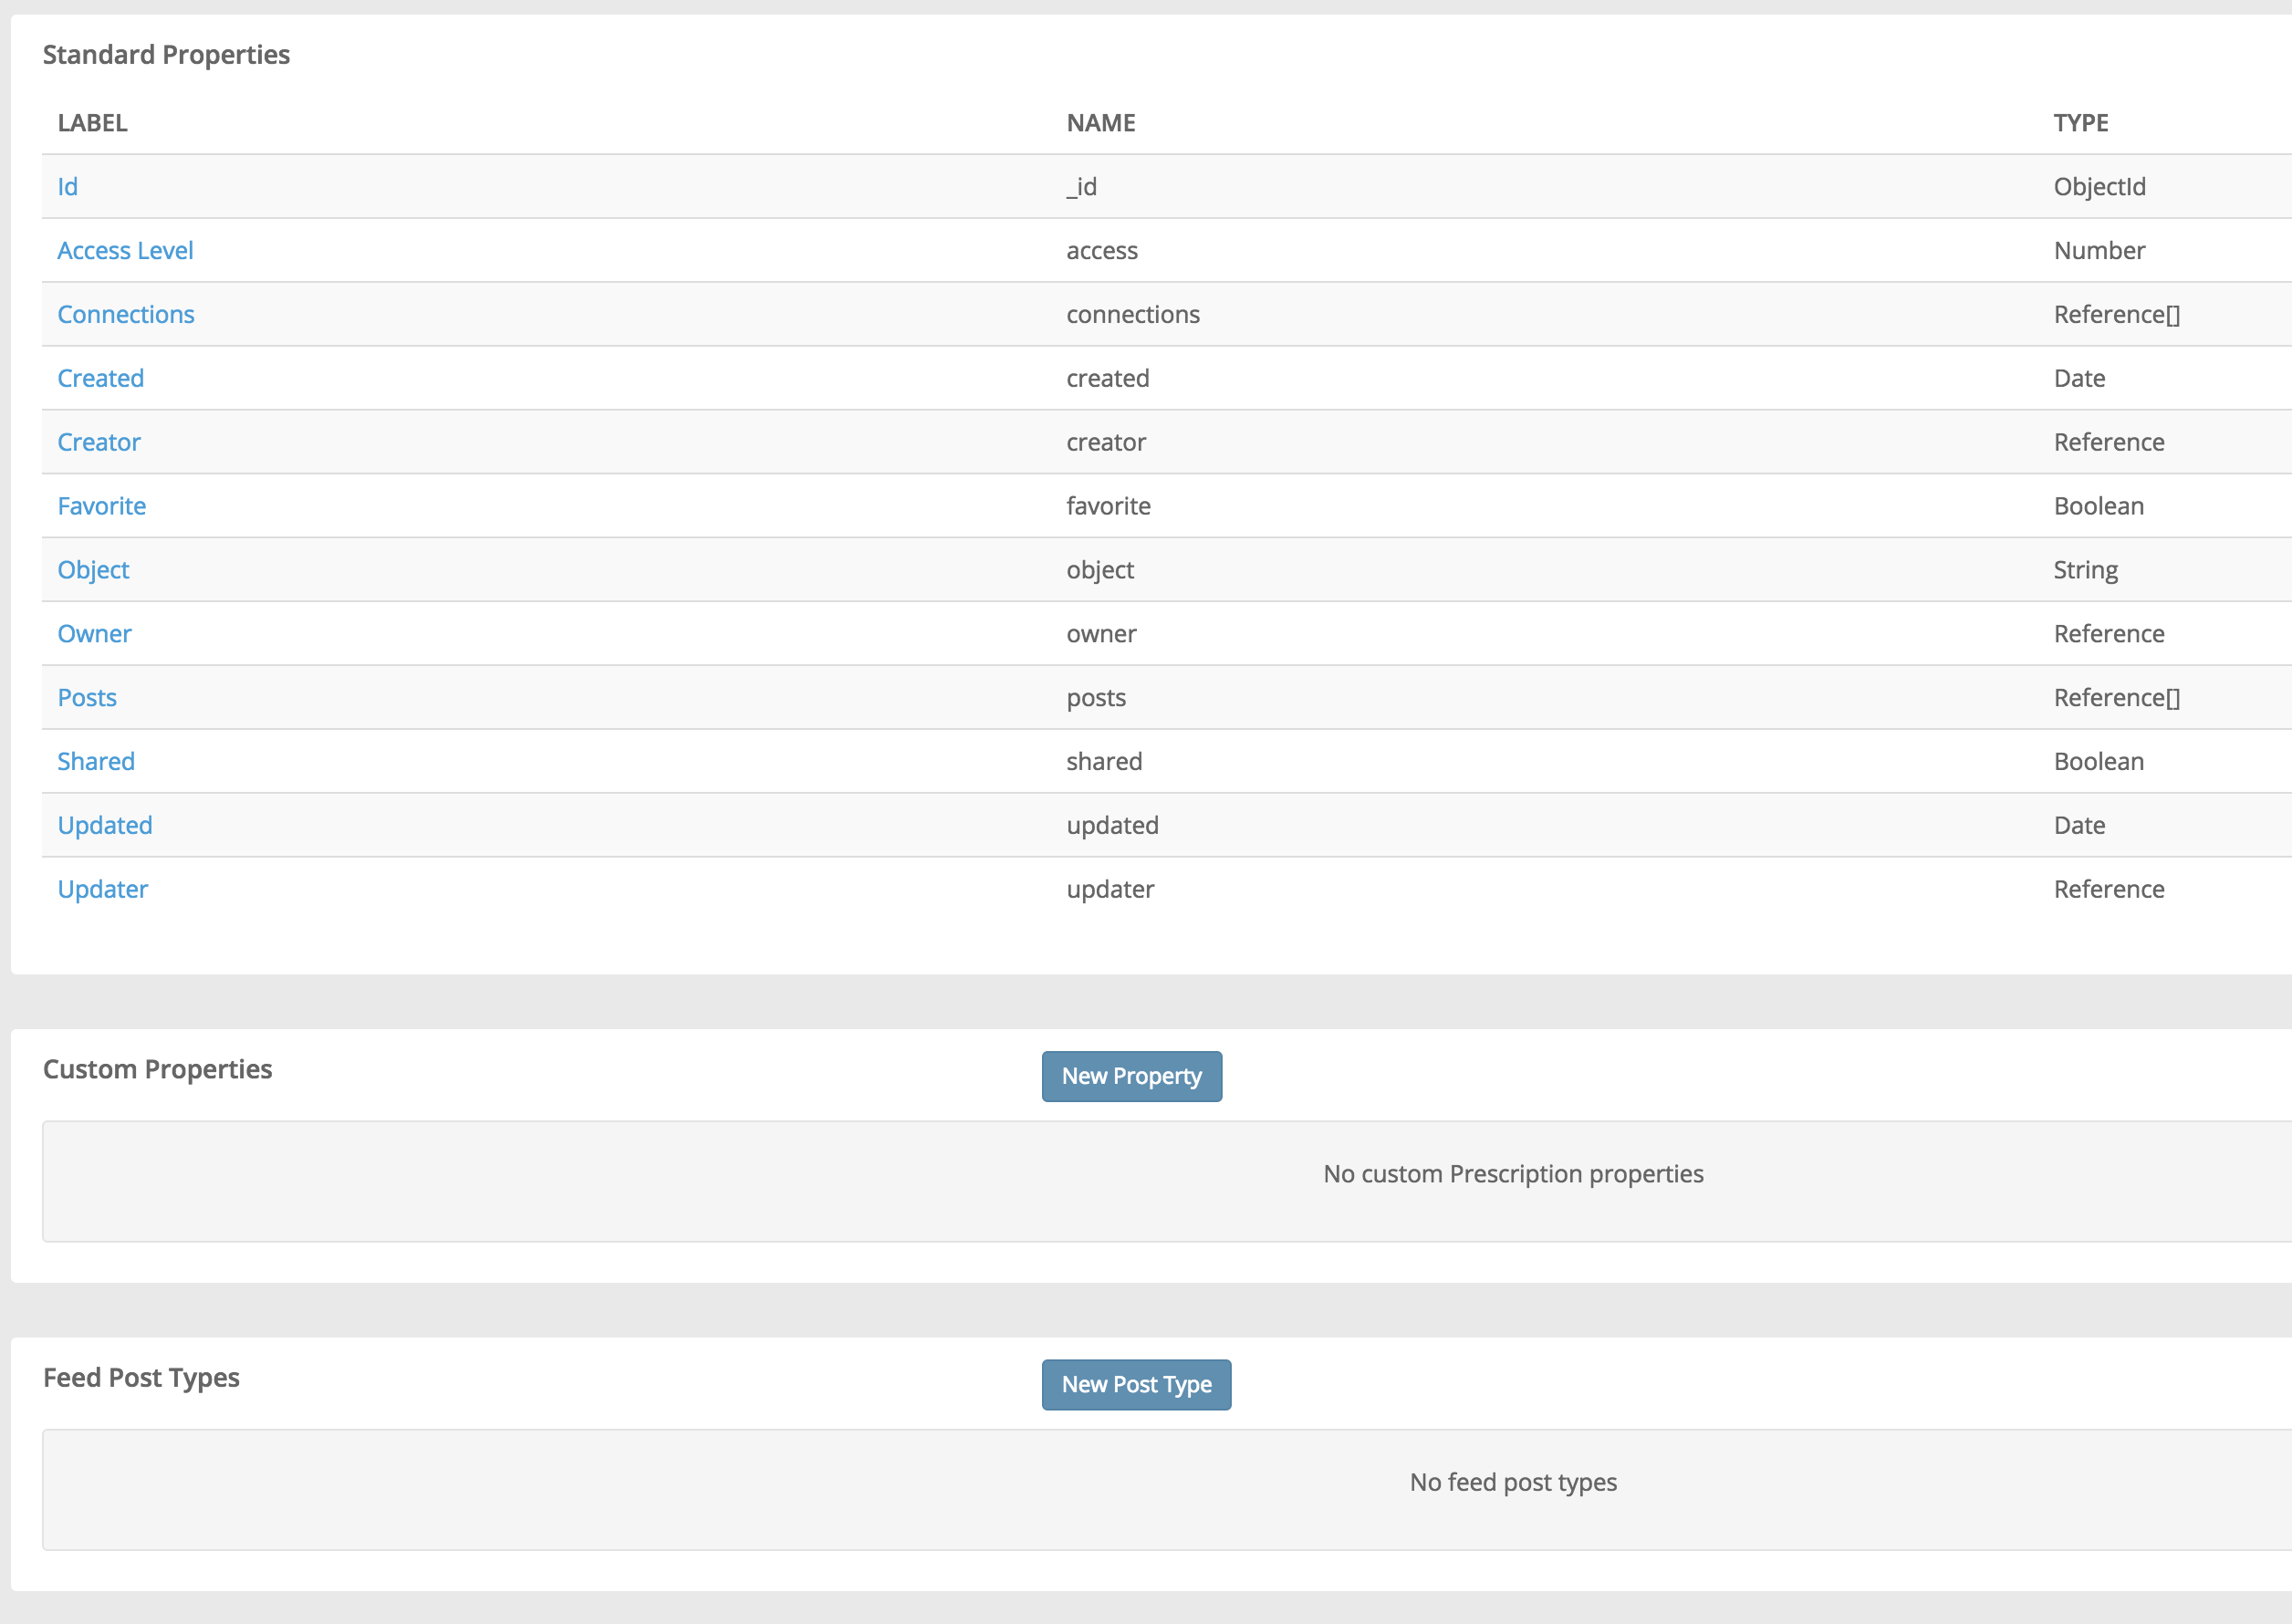
Just scroll down below the list of standard properties and click on the New Property button.
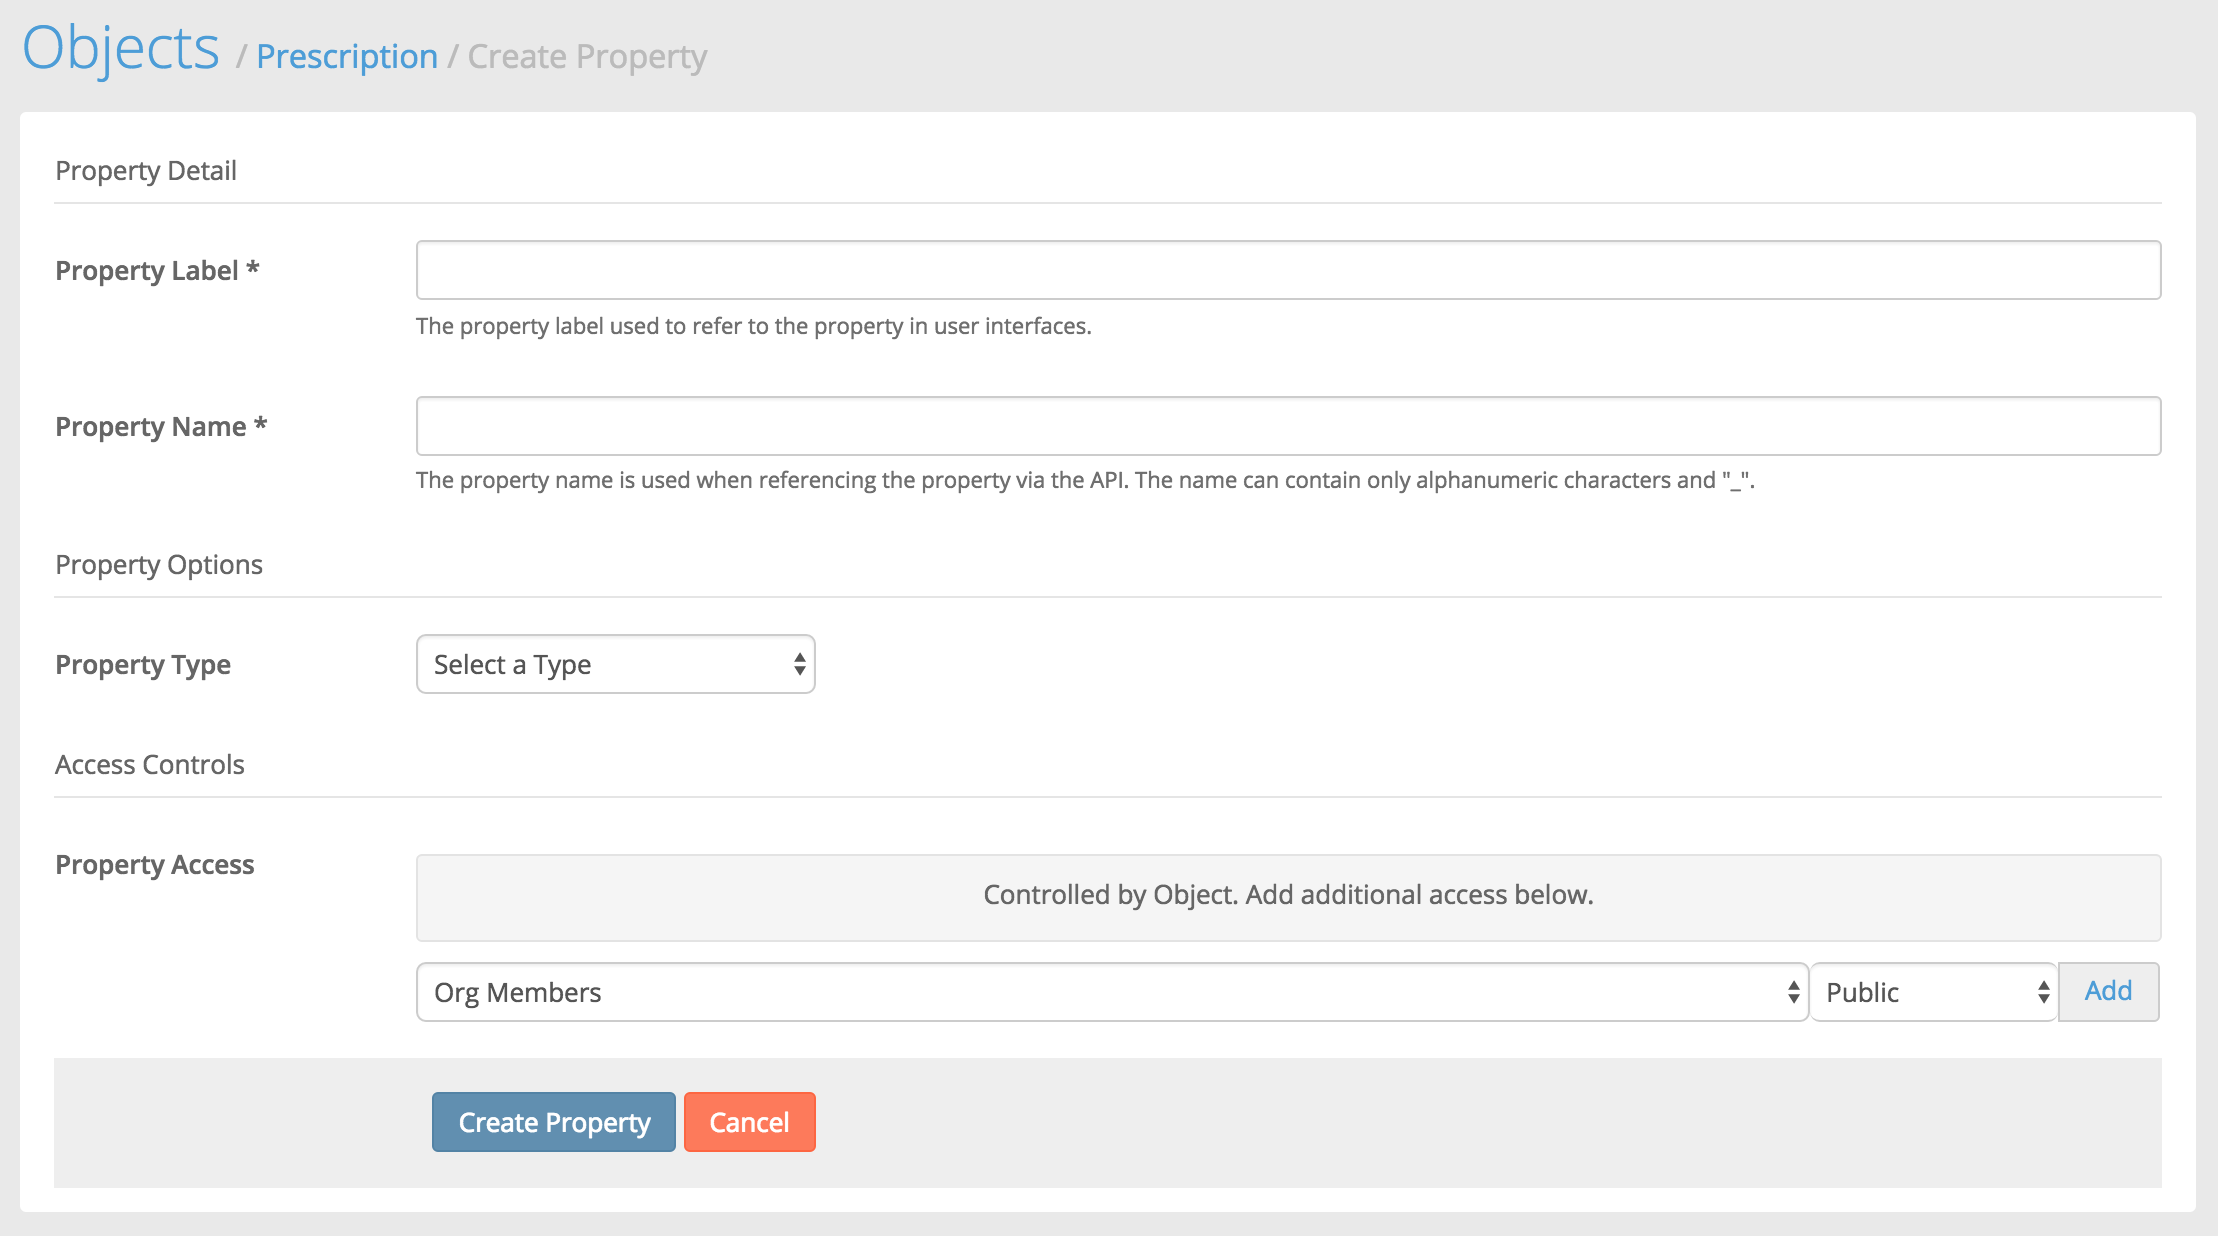
Here you can fill out:
- Property Label: The label of your property that can be used in UI.
- Property Name: The api name of your property.
- Property type: The type of property to create. For more information on property types, see primitive types in the api documentation.
- Property access: Access control settings for this property.
Since we're creating a prescription object, we'll need to create a number of properties to represent a patient's prescription. Here's a few of the properties we'll need to create:
| Label | Name | Type | Description |
|---|---|---|---|
| Date | c_date | Date | Date of the prescription |
| Dispense | c_dispense | Number | Amount to dispense per refill |
| Patient | c_patient | Reference | Reference to the patient account |
| Provider | c_provider | Reference | Reference to the provider account |
| Refills | c_refills | Number | Number of refills |
| Rx | c_rx | String | Prescription details |
First we'll create the Patient property.
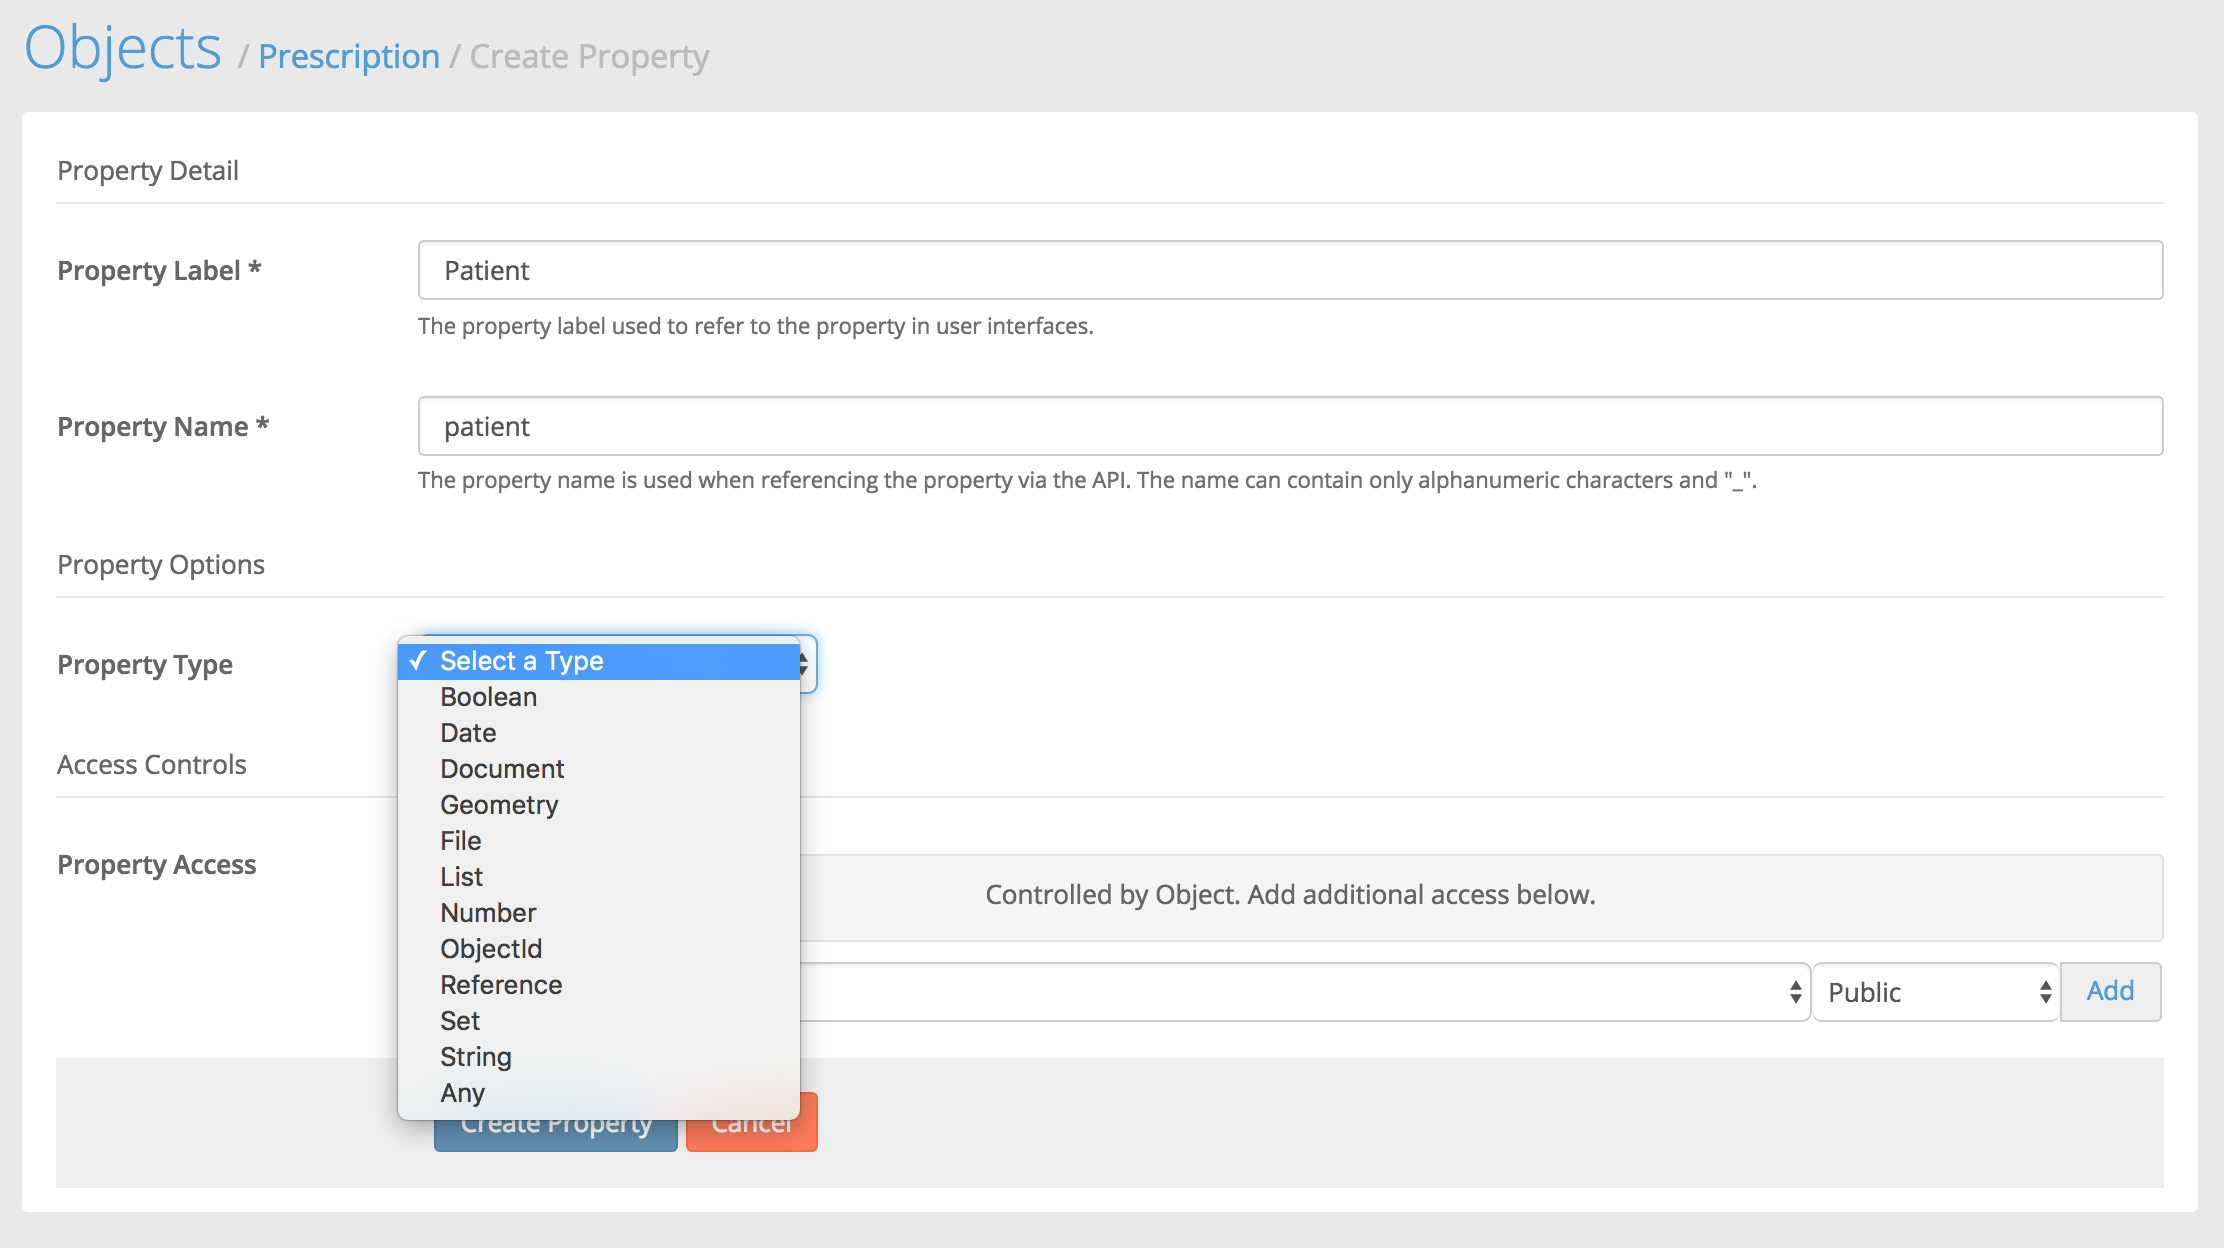
From the Property Type list, we'll select Reference. Then we'll be presented with more options particular to the reference property.
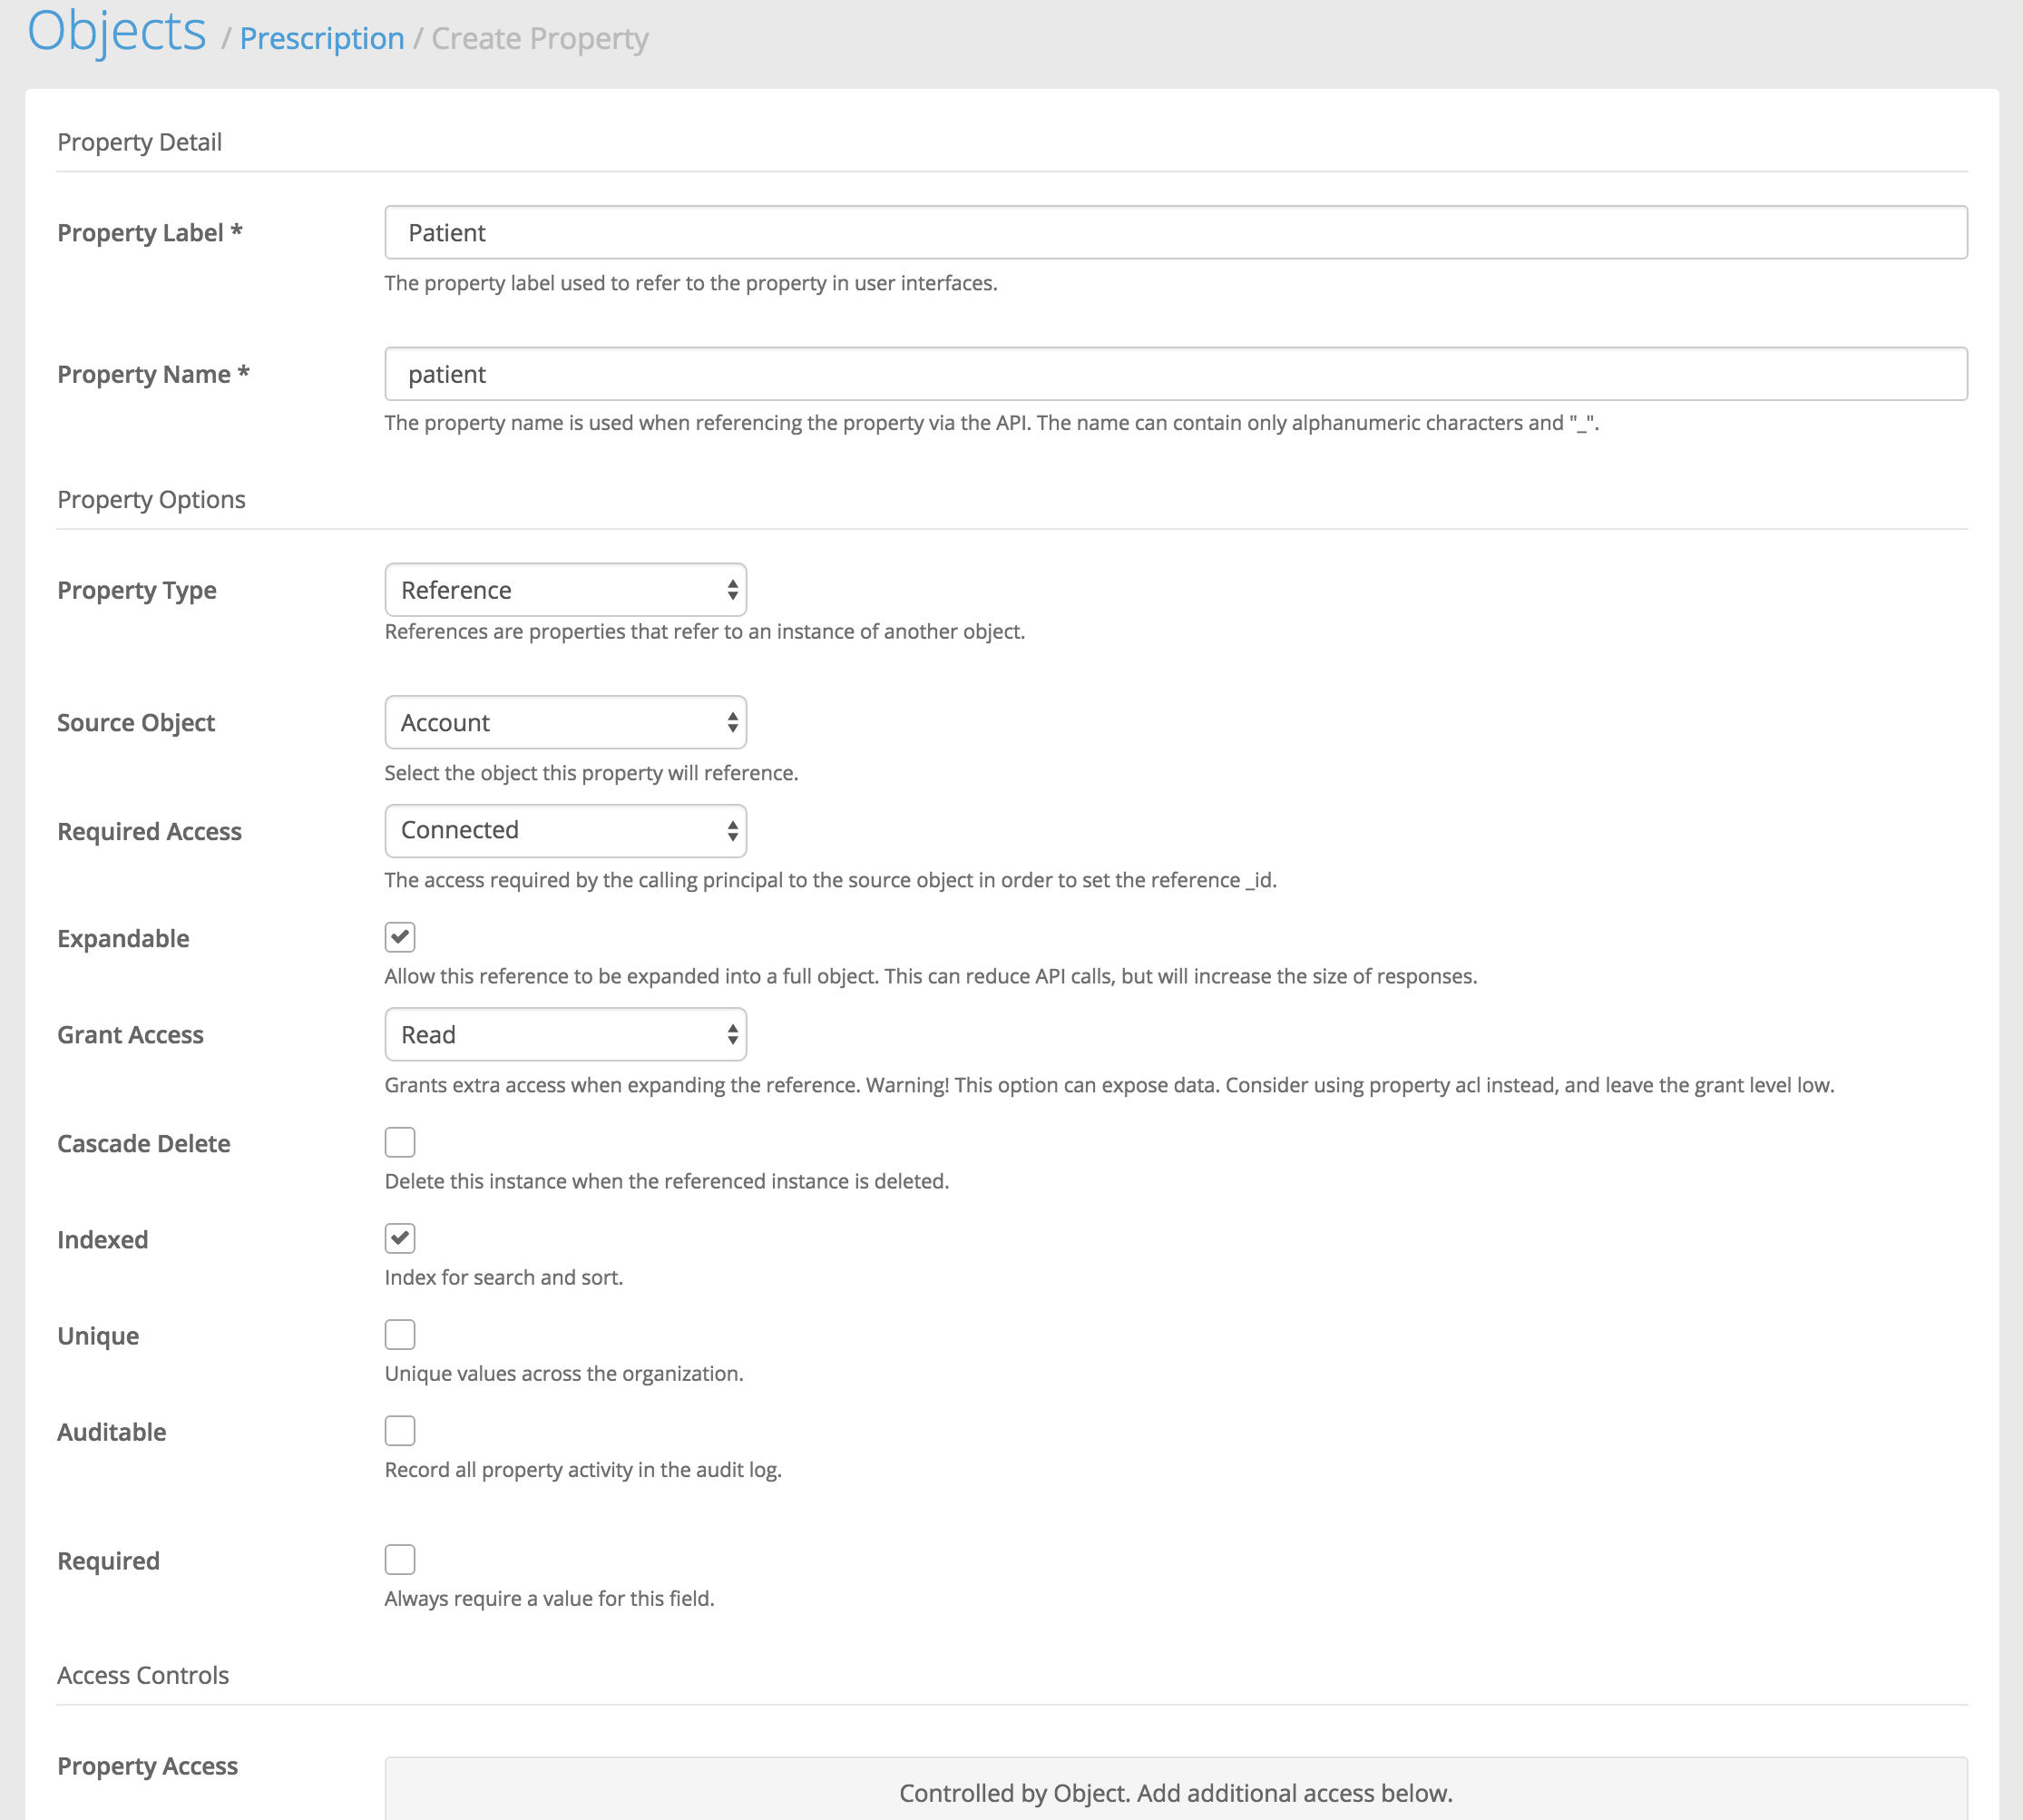
For Source Object we'll select "Account" because we want to relate the prescription to the patient's account record. For Required Access we'll select "Connected". This means that whoever is creating the Prescription will need to have at least that level of access to the patient's account record. For Expandable we'll leave it as selected. For Grant Access we'll select "Read". Lastly, we'll select Indexed. This will allow us to query prescriptions by patient account _id. Then client Create Property.
After creating the Patient account, you will see it appear in the Custom Properties List.

Next, we'll create the Date property.
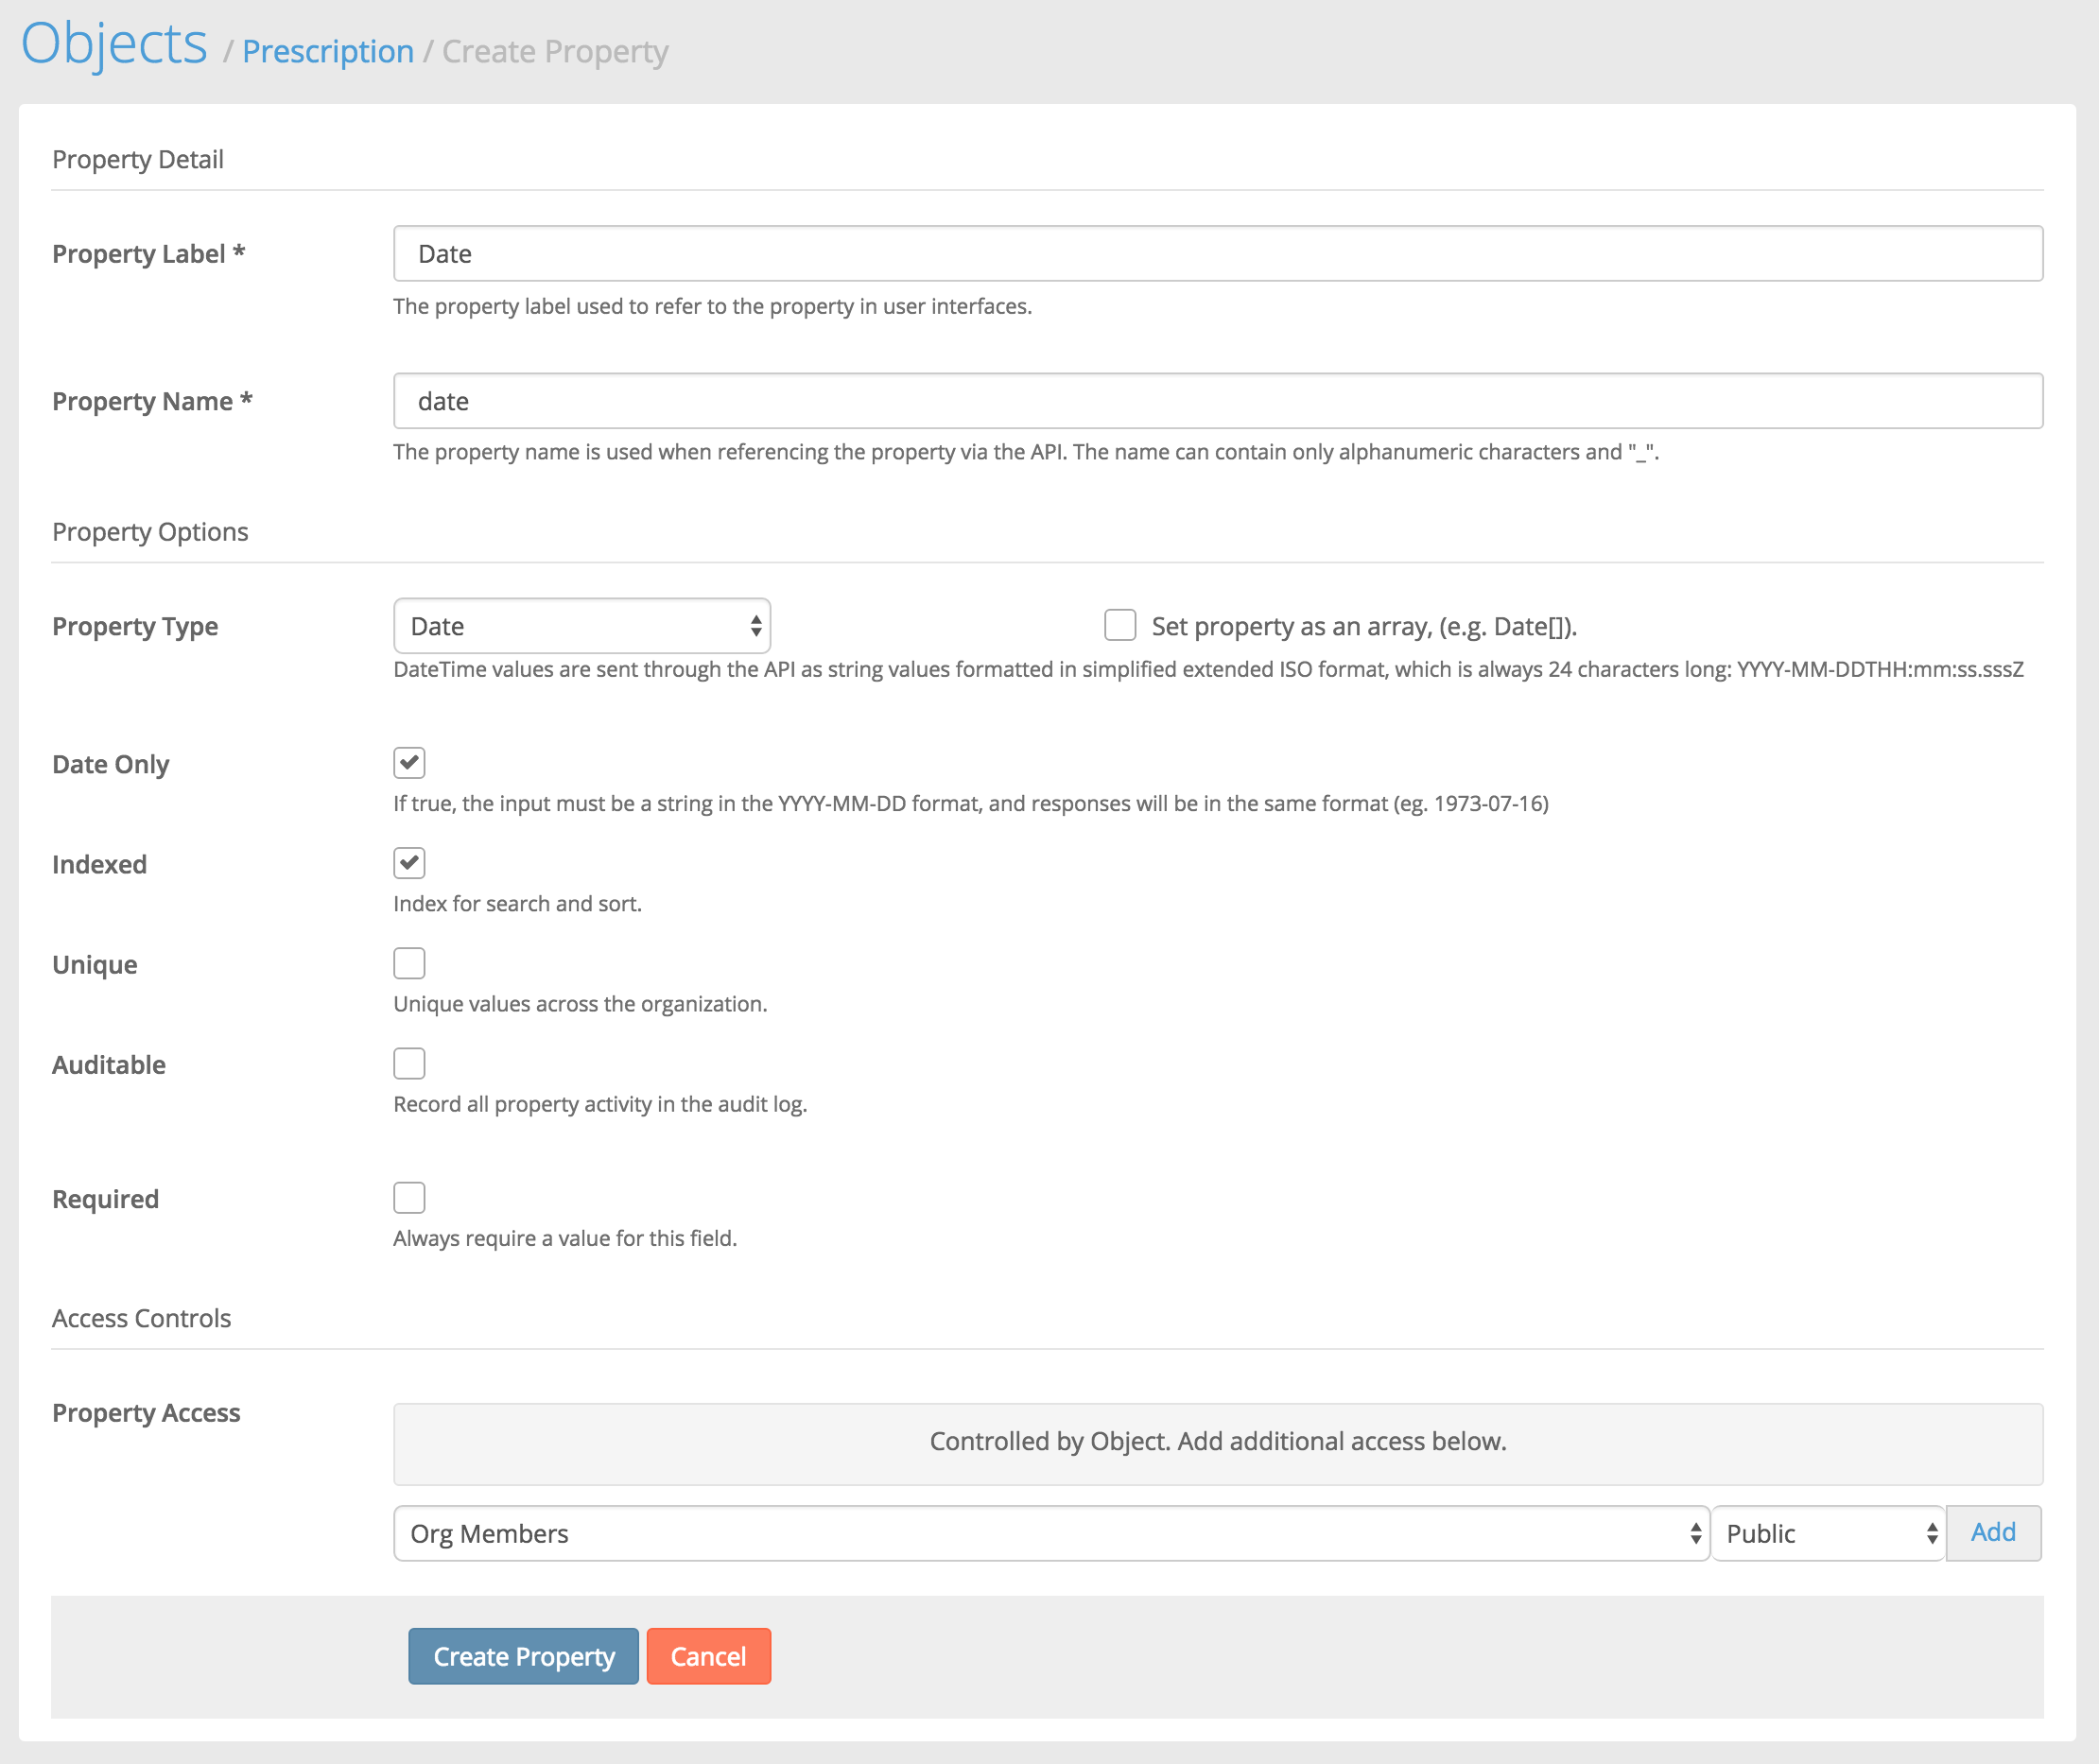
We'll select "Date" as the Property Type. Then select Date Only as this does not need to be a date-time property. Then Select Indexed so that we can query prescriptions by date.

Next, we'll creat the "Rx" property.
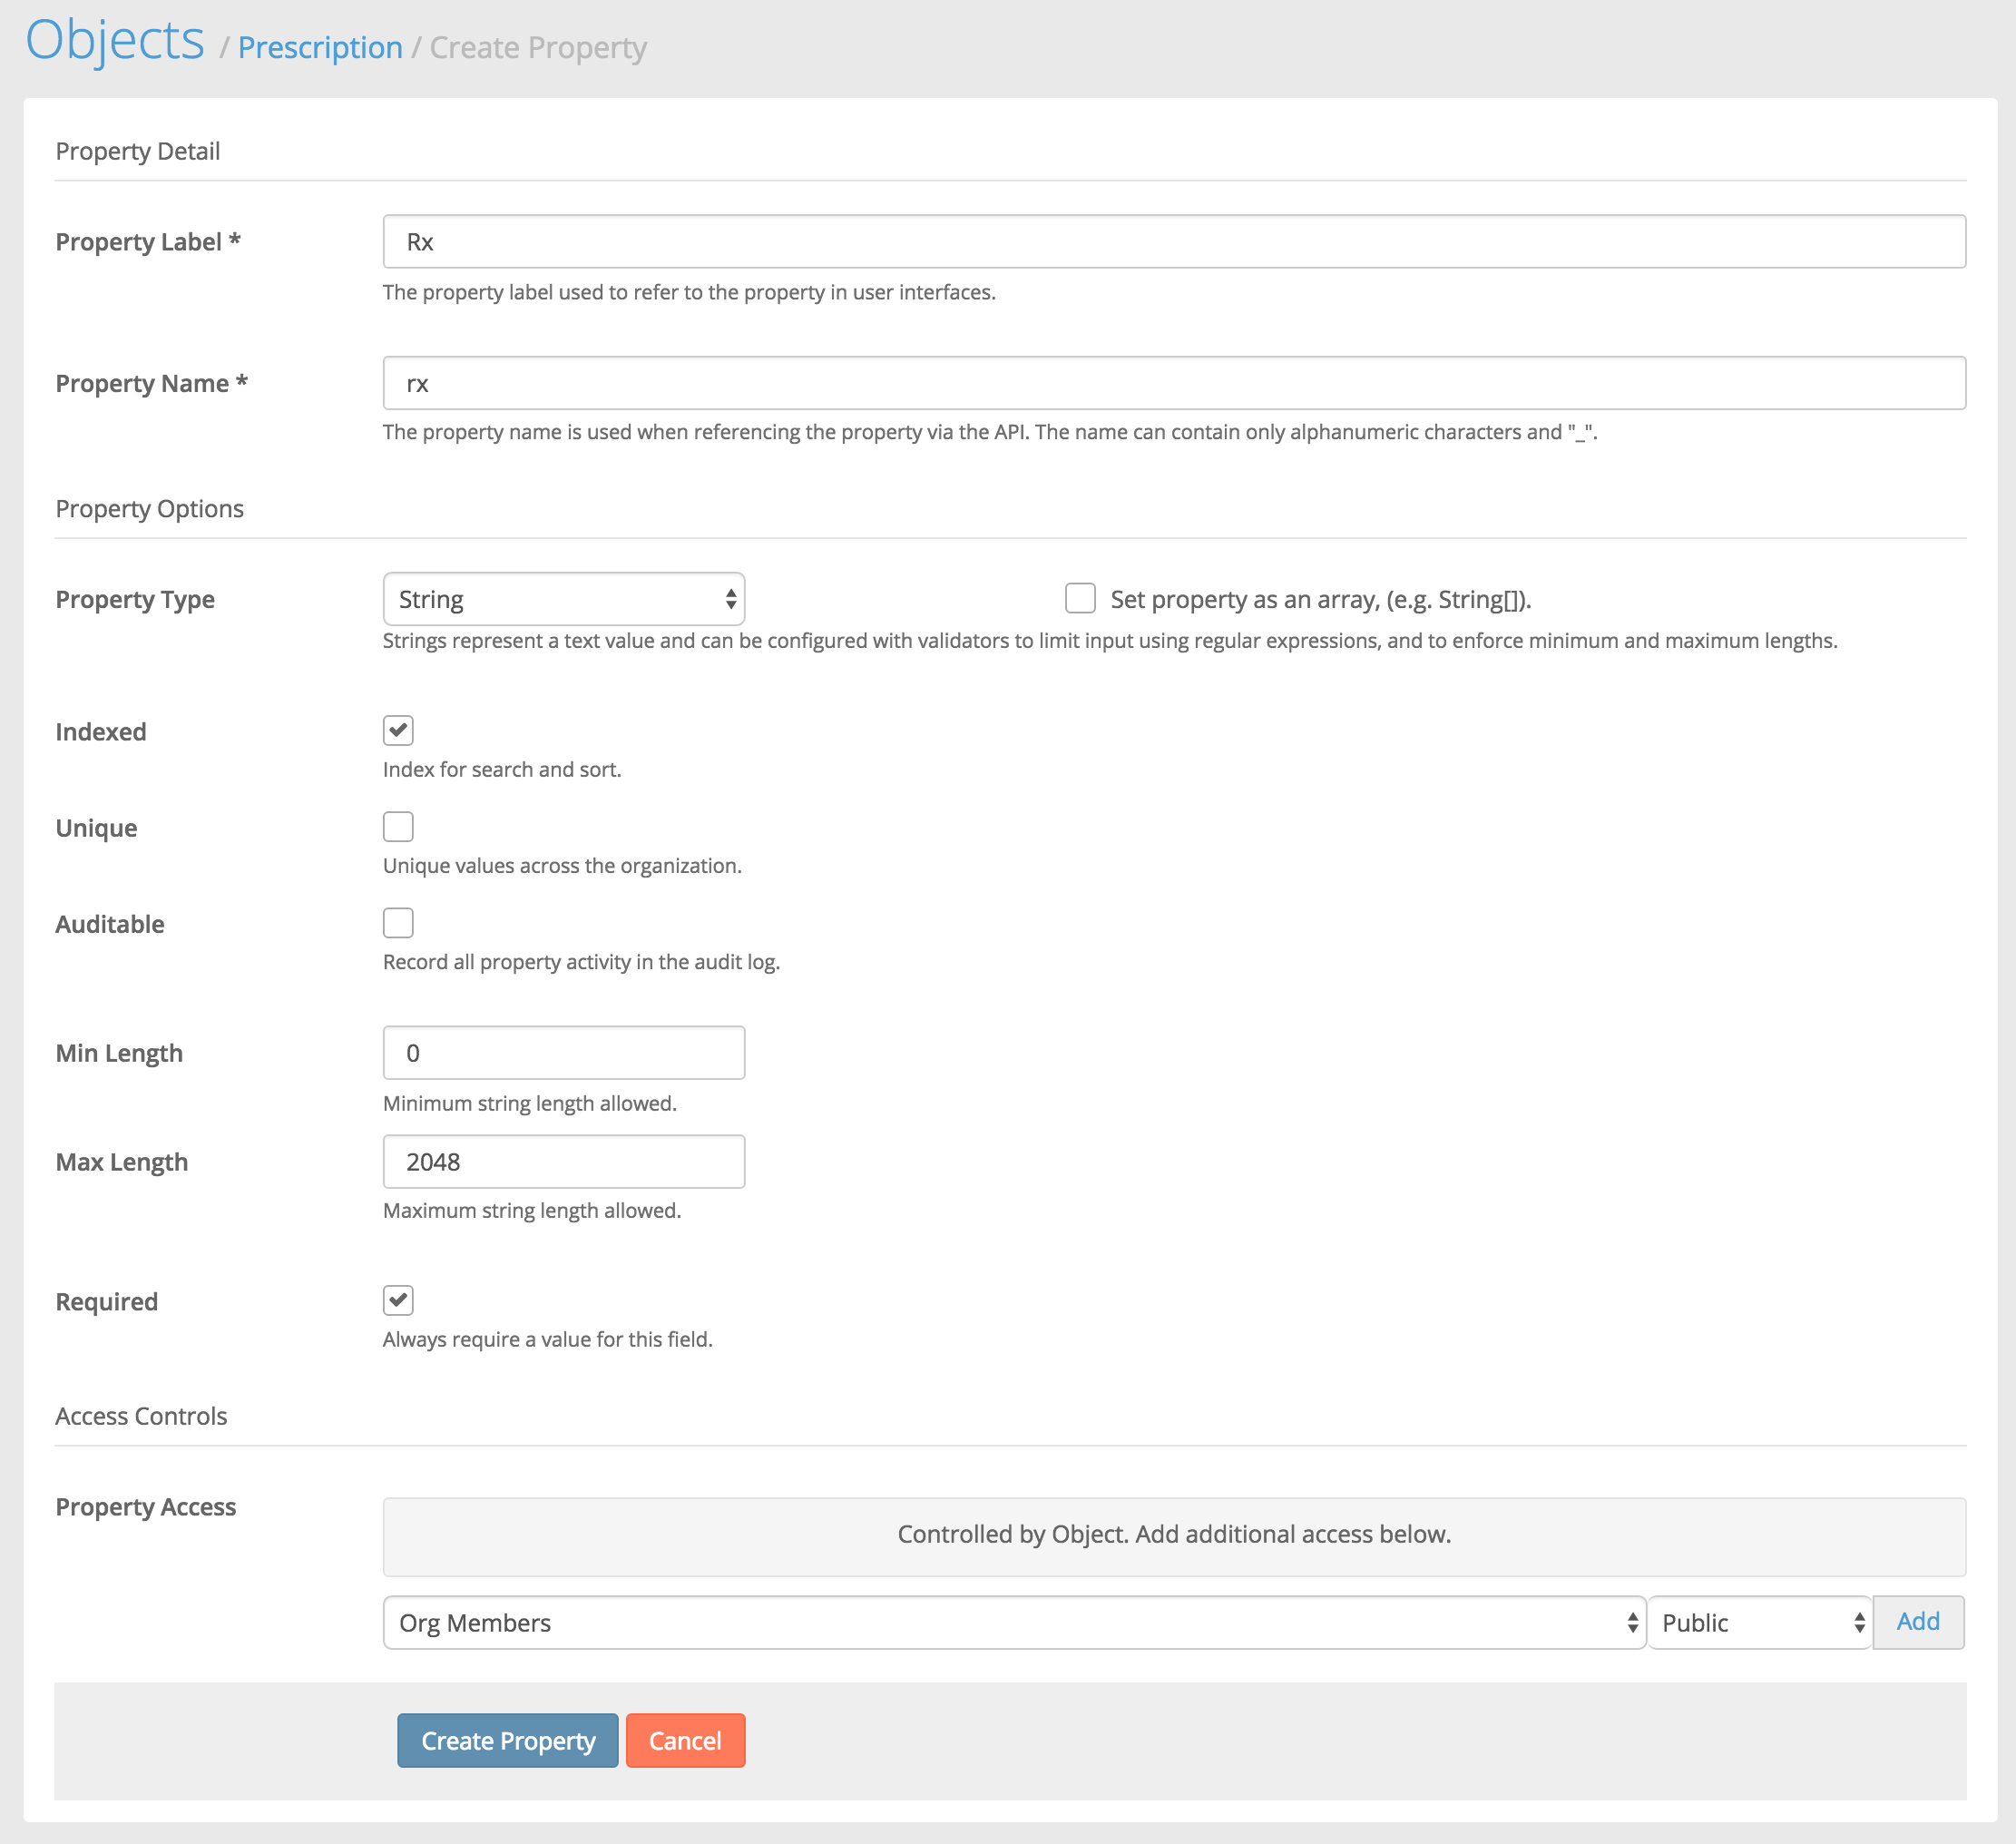
This time we'll select "String" as the property type. Select Indexed, and privide a Max Length that is appropriate.
We'll create a few more properties to complete the object.

Updated 4 months ago