Registration
Great, we've got our New Project setup and we're ready to rock and roll.
This tutorial will make use of the Account Registration route which is disabled by default in your Organization Settings. You'll want to enable registration under Settings > Organization in order for it to work. See Configuring Org Settings for more details.
Account registration boils down to one function
Medable.client().registerAccount...This function takes in a number of default parameters to initialize the Account object with. But only five of them are required
- First Name
- Last Name
- Password
- Mobile Number
Optional parameters include gender, dob, profile image, and role.
Here, we'll show you how to create a basic registration form using Swift and Interface Builder. At the end we provide a zip file containing the final result of this step-by-step tutorial.
Create Registration Form
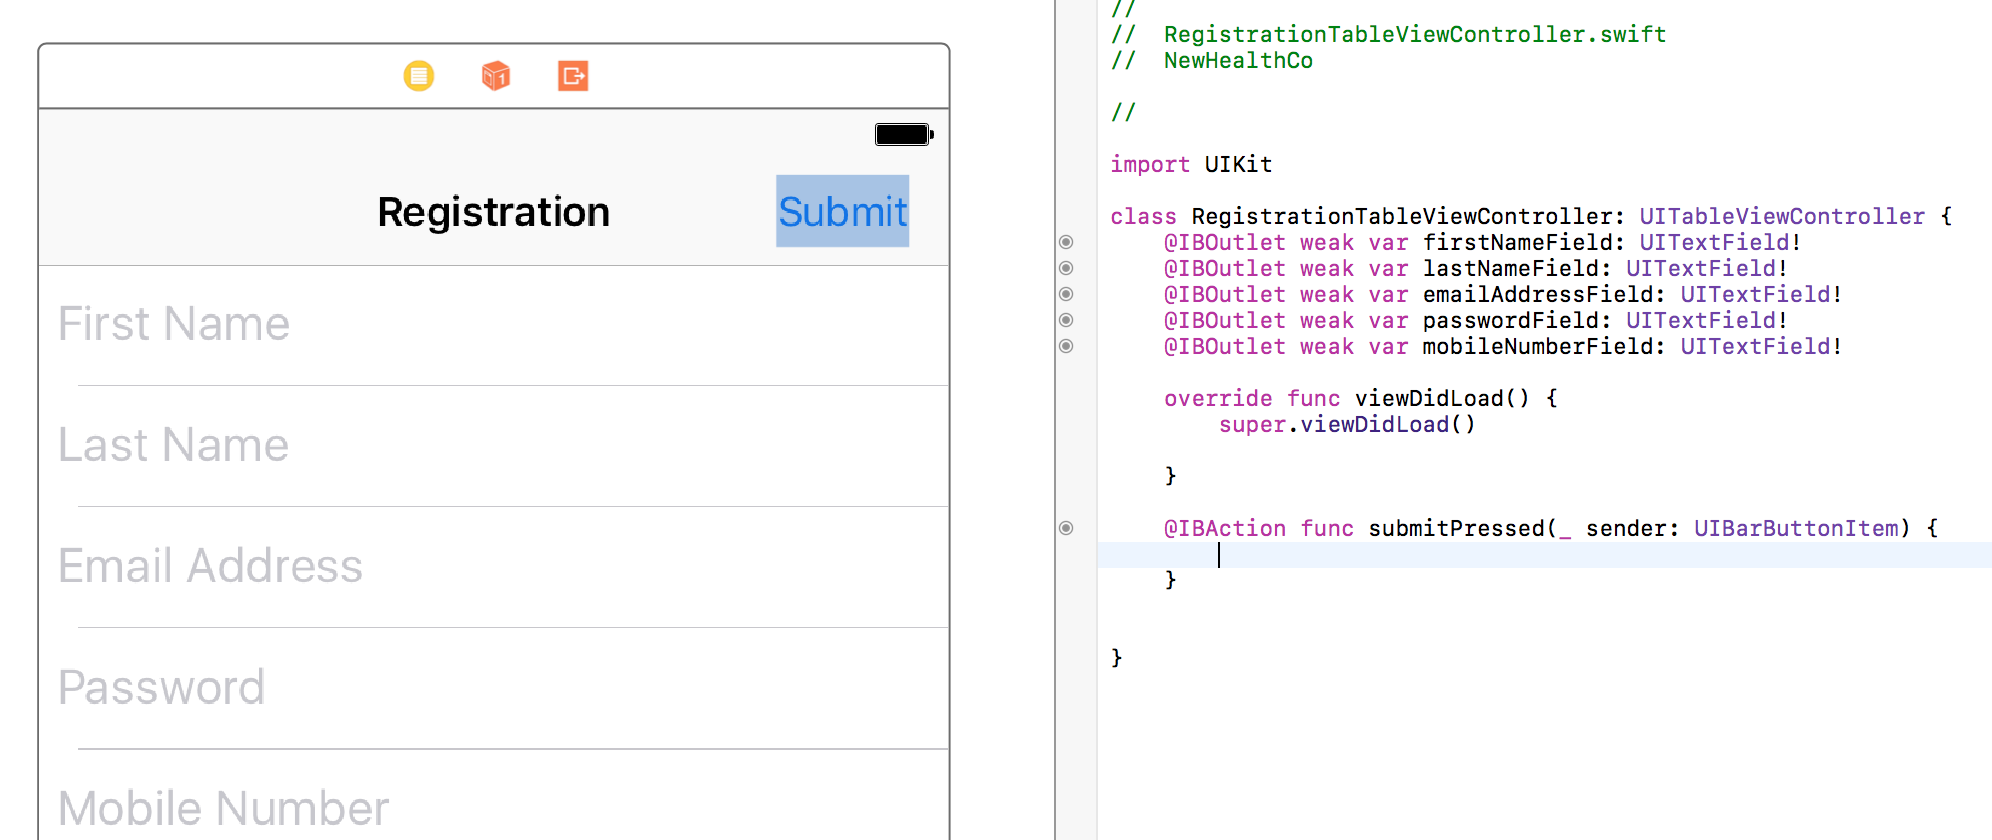
- Open Interface Builder (IB) by opening
Main.storyboard - Drag a Navigation Controller into IB and set it as the initial view
- Set the table view Content setting to Static Cells
- Drag a UITextField into a static cell with proper struts and springs
- Replicate this static cell for each field you'd like to collect in this form
- Associate an IBOutlet for each text field
- Drag a UIBarButtonItem into the top bar and call it "Submit"
- Associate an IBAction called "submitPressed" with the "Submit" button

Build and Run to make sure that you can see the form and all its placeholder values.
Download Project SnapshotRegister Account
Add one function to the submitPressed function to make the form create a user in your database.
Medable.client().registerAccountWithFirstName(firstNameField.text!, lastName: lastNameField.text!, email: emailAddressField.text!, mobile: "1\(mobileNumberField.text!)", password: passwordField.text!, gender: nil, dob: nil, role: nil, profileInfo: nil, thumbImage: nil, customPropValues: nil) { (account:MDAccount?, error:MDFault?) in
    print("Callback returns account: \(account)")
    print("Callback returns error: \(error)")
}
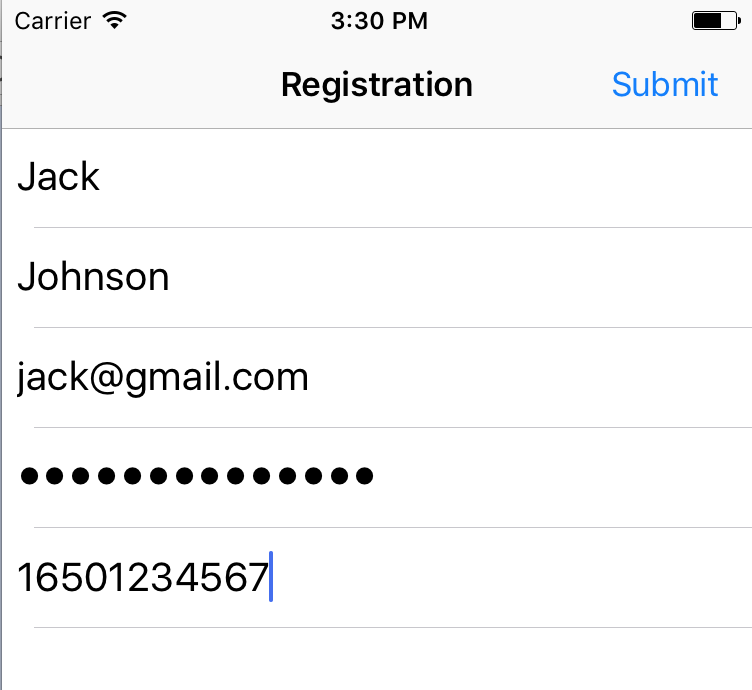
This function simply passes in all data entered into the form as parameters for the registration function. As an example, let's suppose we input the following into our simulator:

Submit the registration form and let's see what we get in the console:
Callback returns error: Optional(kValidationError - validation -
Validation error - *Subfault: kInvalidArgument - error -
Invalid Argument - The chosen password does not meet the minimum Org password strength requirement. - path: password)We got a validation error because our password strength isn't high enough.
Medable uses the zxcvbn password strength estimator to evaluate how strong a password is
You set the minimum password strength in your org settings. The default minimum is
Good, which which maps to 2 on the 0-4 on the zxcvbn scale. We strongly advise against lowering this minimum.

Password Validation
It would be fantastic if we could immediately know whether a password will be strong enough before making an API call. Luckily, there's an open-source library that allows us to do just that.
pod 'zxcvbn-ios'- Add the zxcvbn-ios pod to your Podfile
- Install dependencies by running
pod installon your terminal - Open
RegistrationTableViewController.swiftandimport zxcvbn_iosat the top - Make
RegistrationTableViewControllera delegate for the password text field - Drag a UIView next to the UITextField for the password
- Set this UIView to a Custom Class called DBPasswordStrengthMeterView and drag as an IBOutlet into the controller

The final step is to implement the UITextField Delegate function so that each change in the password field is given a new strength indicator
func textField(_ textField: UITextField, shouldChangeCharactersIn range: NSRange, replacementString string: String) -> Bool {
    let password = (textField.text! as NSString).replacingCharacters(in: range, with: string)
    passwordStrengthMeter.scorePassword(password)
    return true
}
Build and Run
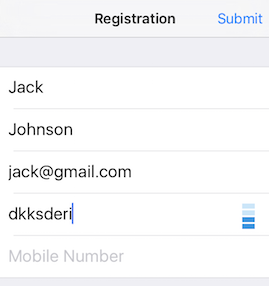
I've turned off secure text entry to show that the meter does indeed adjust to the complexity of the password

We want to be sure that when we submit the form, the password strength is at least as strong as our org setting minimum. The default minimum is 2 (Good). The lowest is 0 (Weakest). Add the following lines to the submitPressed function before calling register.
if DBZxcvbn().passwordStrength(passwordField.text!).score < 2 {
    print("The password is not strong enough")
    return
}
Now our password validation happens locally before making any network calls and our user isn't left guessing a million different passwords hoping they'd meet the minimum strength requirement!
Download Project SnapshotMobile Number Validation
Another type of error you might get when trying to call register is kInvalidPhoneNumberFormat. This means the entered mobile number is probably not a real number. Medable uses Google's phonelib to validate numbers.
Let's use the iOS version of phonelib to check that a number is valid before making an API call
pod 'libPhoneNumber-iOS'-
Add the libPhoneNumber-iOS pod into your Podfile and
pod installin the terminal -
Open
RegistrationTableViewController.swiftandimport libPhoneNumber_iOSat the top -
Add the following lines to the
submitPressedfunction before calling register.let phoneUtil = NBPhoneNumberUtil()
do {
let myNumber = try phoneUtil.parse(mobileNumberField.text!, defaultRegion: "US")
if !phoneUtil.isValidNumber(myNumber) {
return
}
} catch let error as NSError {
print(error)
}
We first define the util that will parse and validate the user's mobile number. To test this, run the app with an obviously invalid phone number like 12223334444 and the function should return with an error in the console without calling register.
Note: the mobile number must be formatted with the country code included or it will be marked as invalid and registration will fail.
Registration Complete
You now have a registration form to sign up new users!
Updated 4 months ago